If you want to play chess... Click me!
If you want to play chess... Click me!
1. e4 is often much more tactical, while 1. d4 is often more positional.
The most common 1. e4 openings are the Spanish and Italian (as well as theoretically bad but cheesy tactical openings at a lower level)
Both the Spanish and Italian follow: 1. e4 e5 2. Nf3 Nc6 (If you need a reminder how to read chess notation, please click)
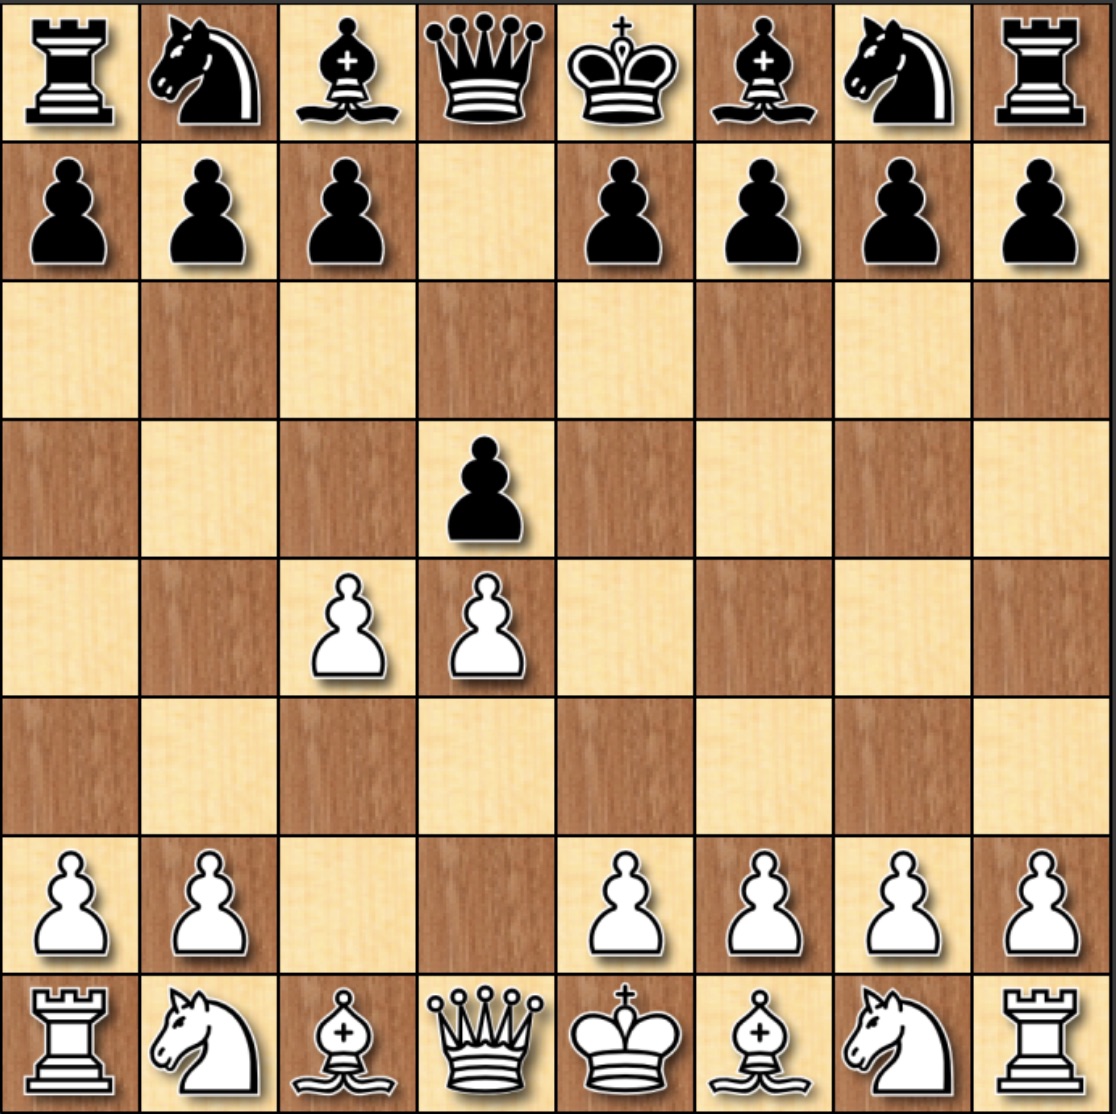
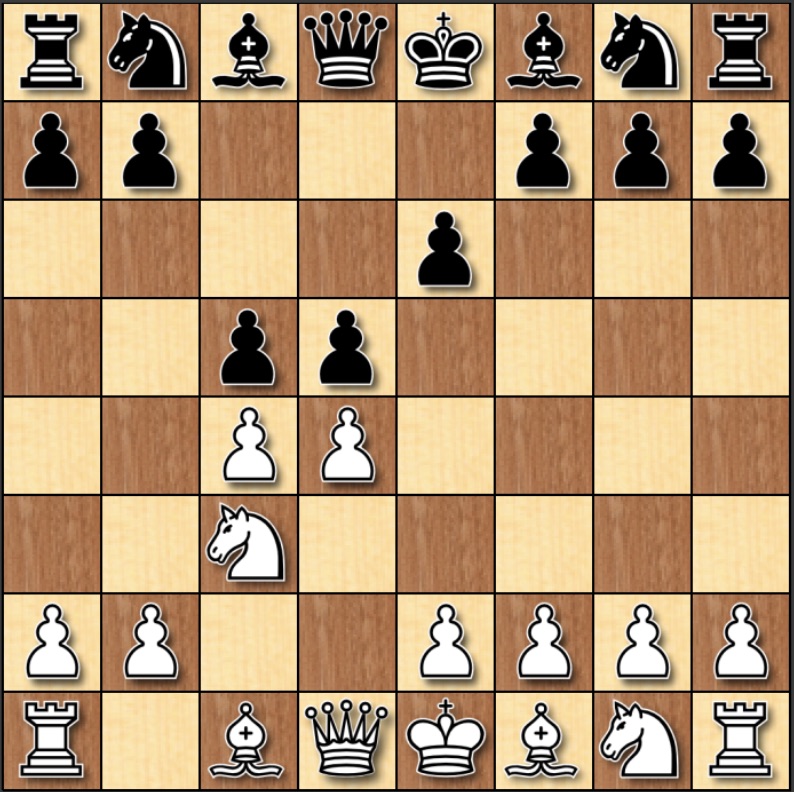
The Italian begins with: 3. Bc4 and black responds with 3. ... Bc5 or Nf6
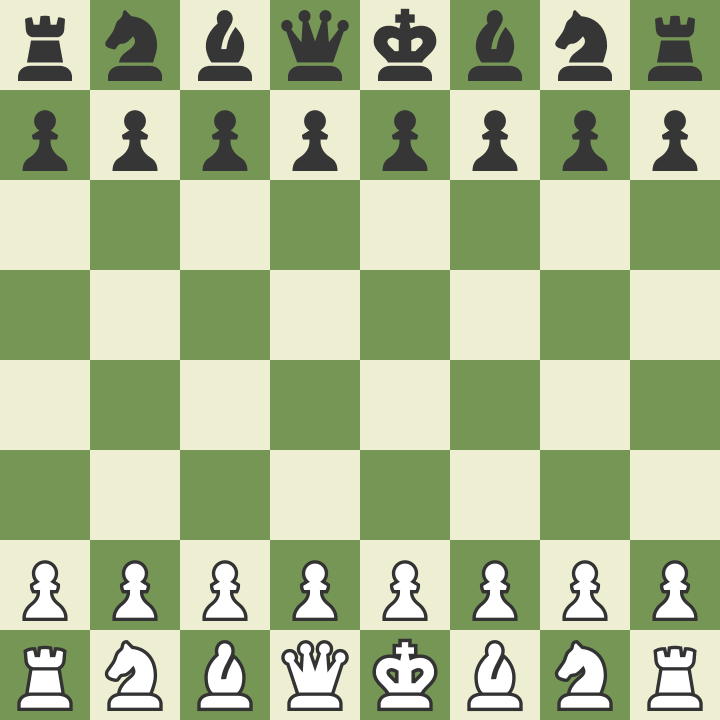
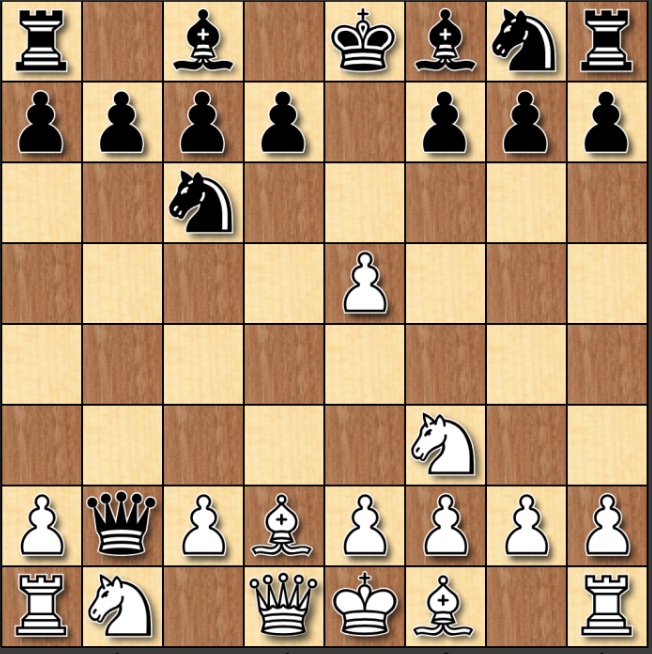
A typical resulting structure of this opening looks as follows:
1. e4 e5 2. Nf3 Nc6 3. Bc4 Nf6 4. d3 Bc5 5. O-O d6 6. Nc3 O-O
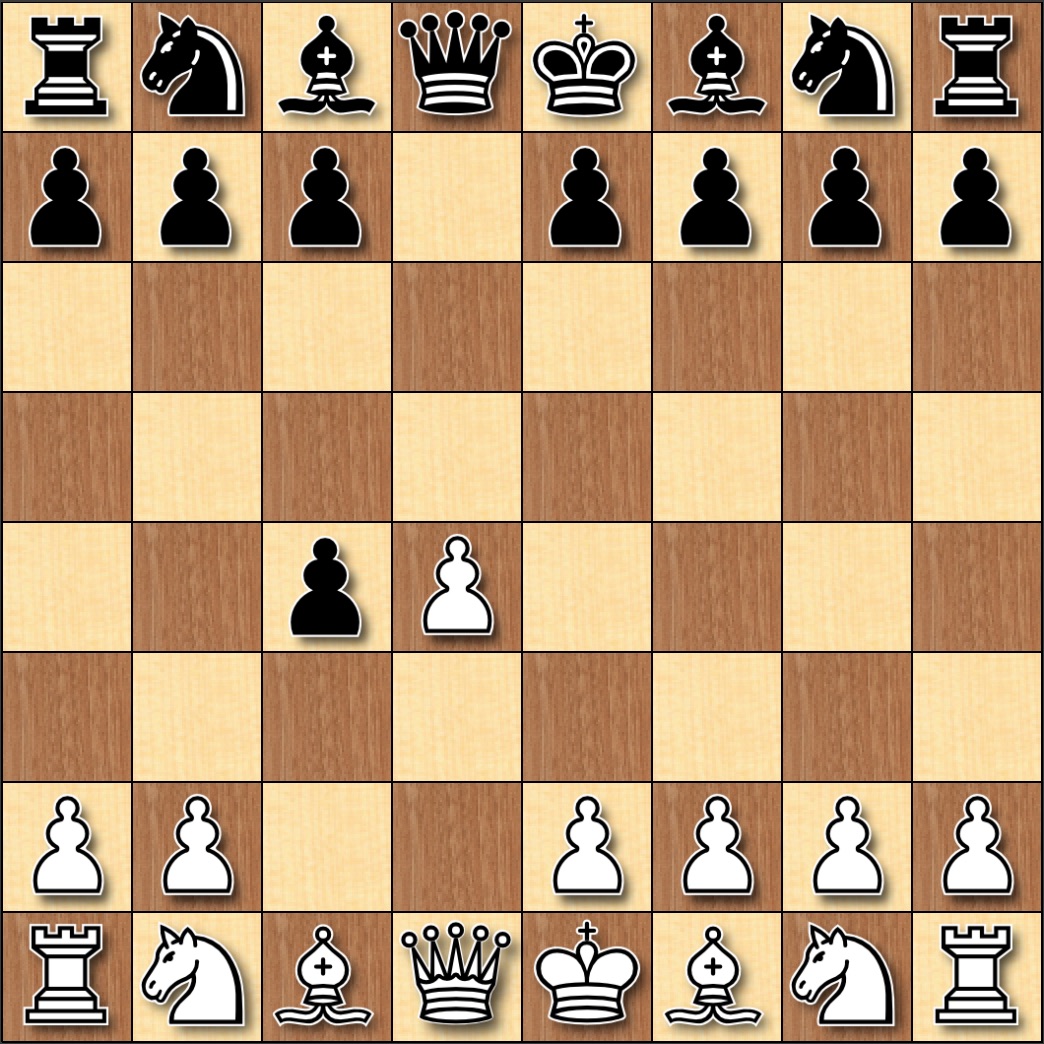
The Spanish comes after: 1. e4 e5 2. Nf3 Nc6 3. Bb5
With black typically responding with 3. Bb5 Nf6 (Berlin Defense) or a6, with a6 being the more common move.
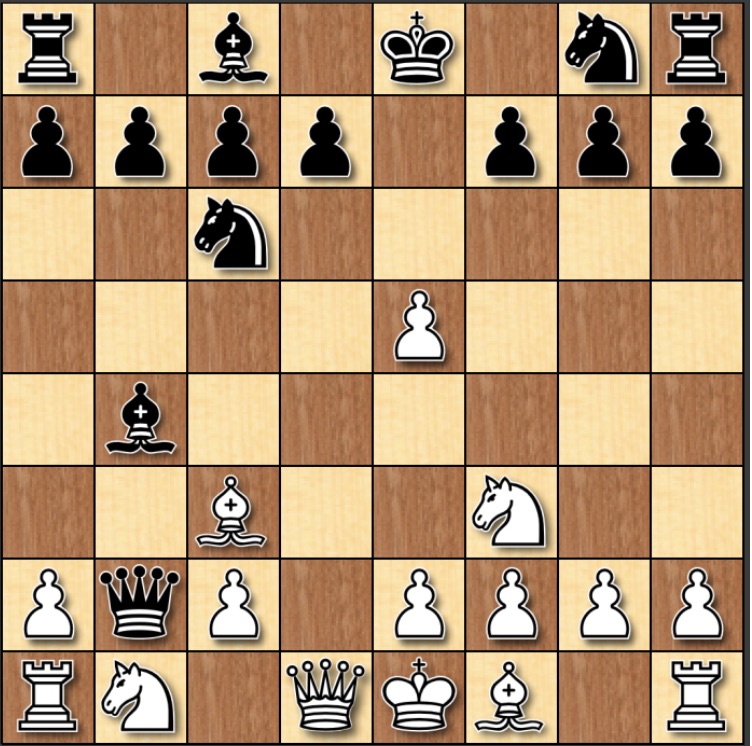
A typical structure will result in a position like:
1. e4 e5 2. Nf3 Nc6 3. Bb5 a6 4. Ba4 Nf6 5. O-O Be7 6. Re1 b5 7. Bb3 O-O
1. e4 e5 2. Nf3 Nc6 3. Bb5 a6 4. Bxc6 dxc6 5. O-O Bg4, where this line with Bxc6 losing some initiative for white.
These are combined because they are both "tricks", and are not legitimate openings. They will just be covered as new players will often fall for them
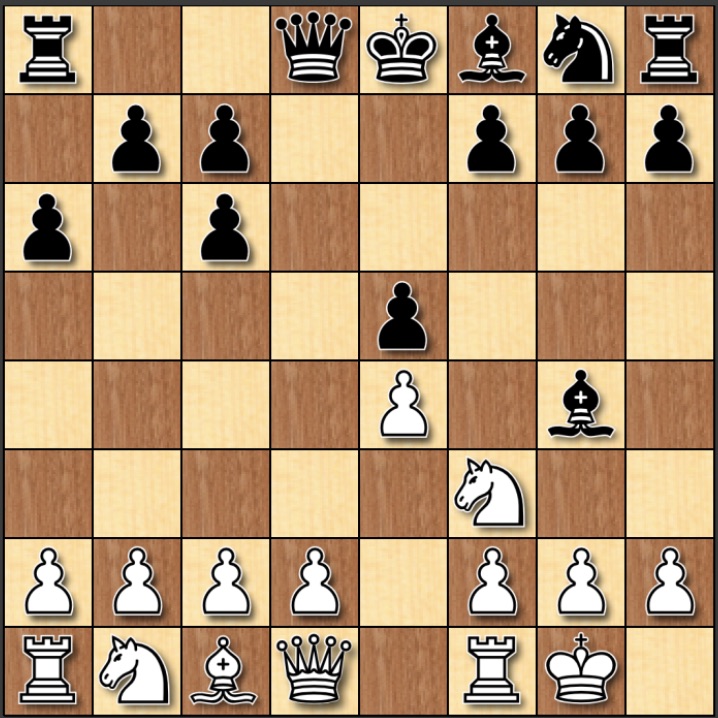
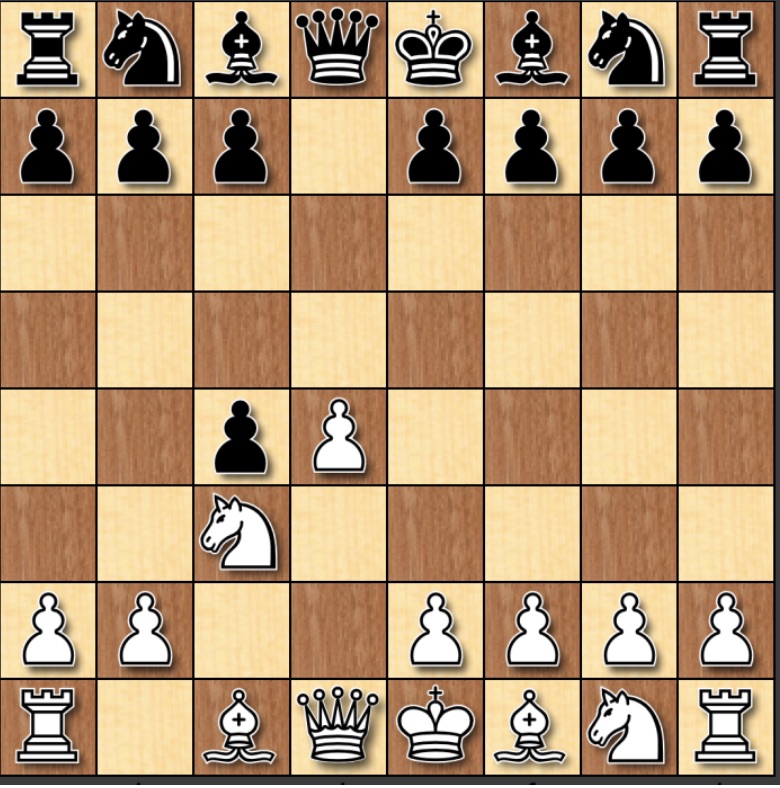
First, the Fried Liver
The Fried Liver starts from a familiar structure: 1. e4 e5 2. Nf3 Nc6 3. Bc4 Nf6

But instead of playing normal developing moves into an Italian like structure, white plays 4. Ng5.
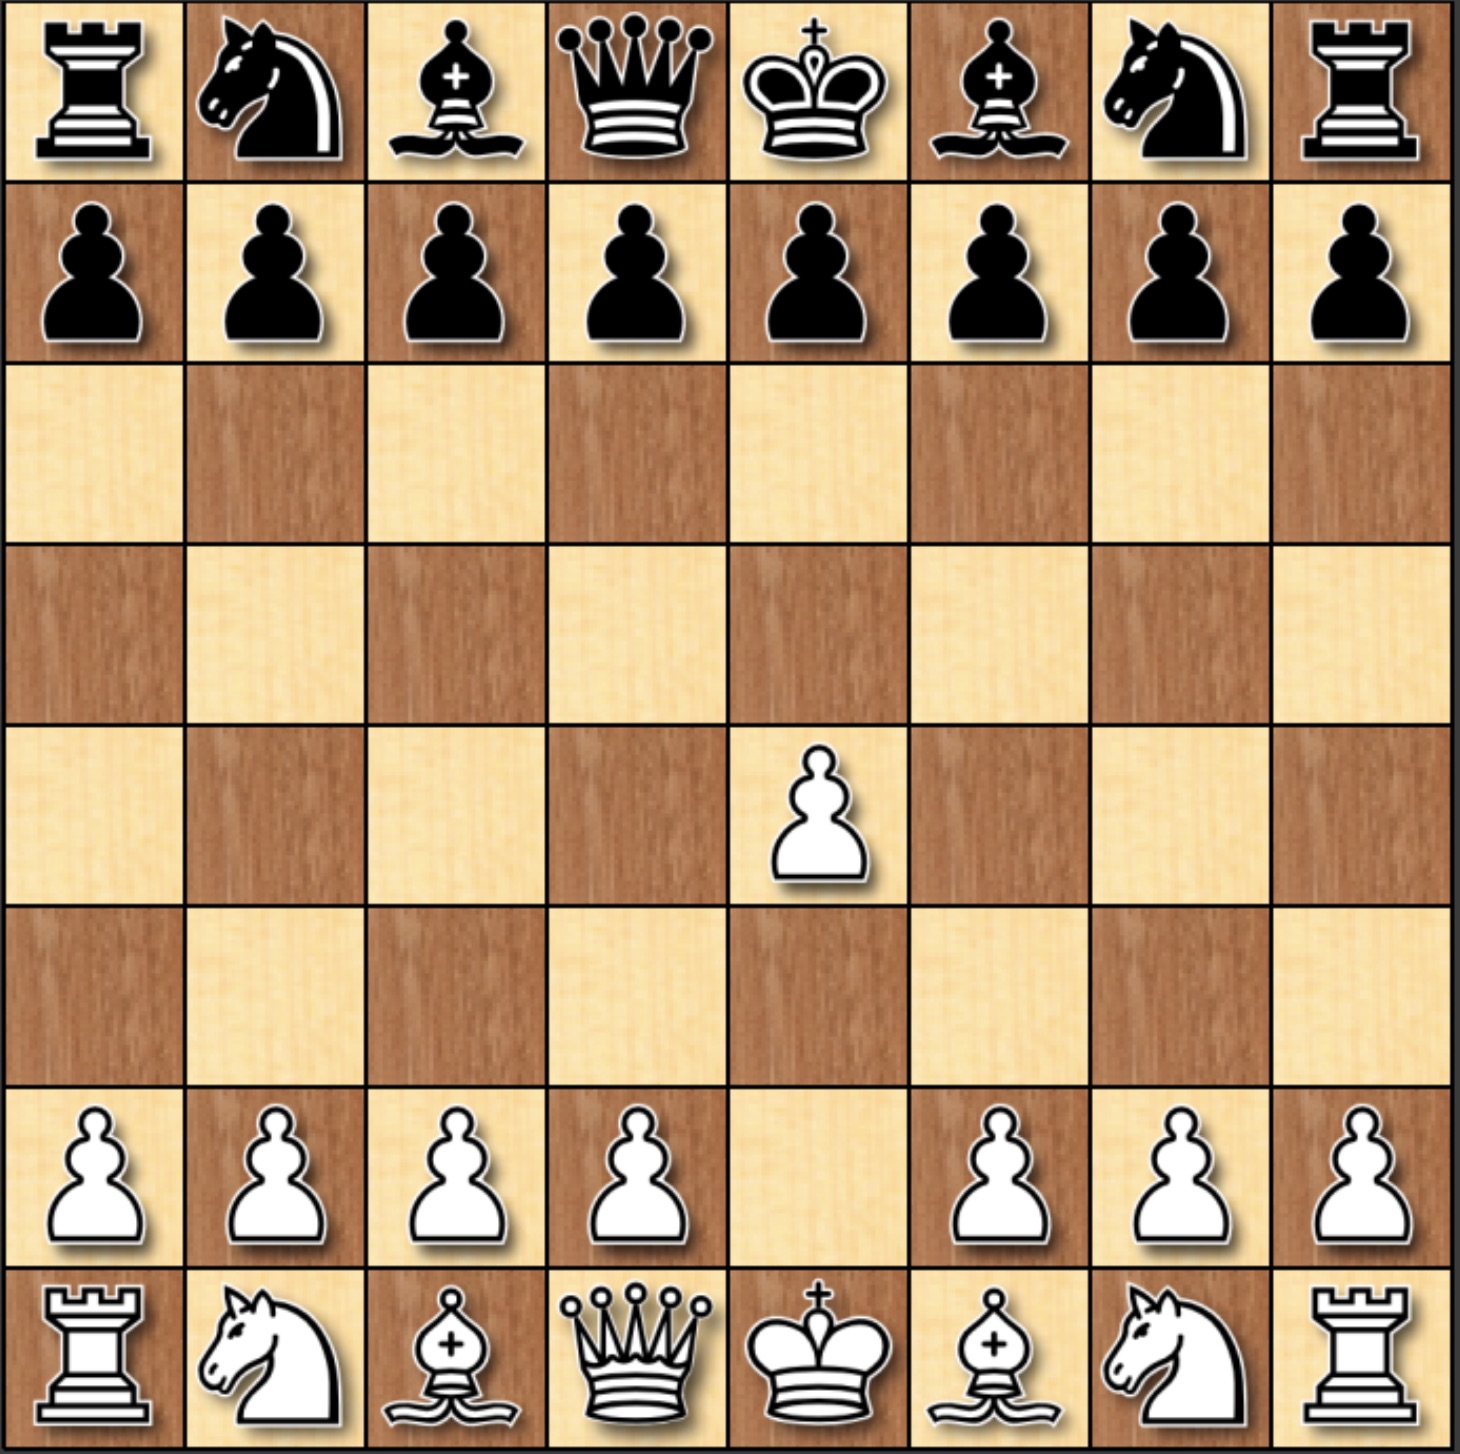
At a glance, this looks like a very annoying problem for black to have to deal with, with obvious way to defend this pawn.
The answer is 4. ... d5. This move blocks the square from the Bishop and attacks the Bishop at the same time. Here theory suggests 5. exd5 Na5 6. Bb5+ c6 7. dxc6 bxc6 8. Bd3
Here you are down a pawn, but the engine evaluates this as even for both sides.
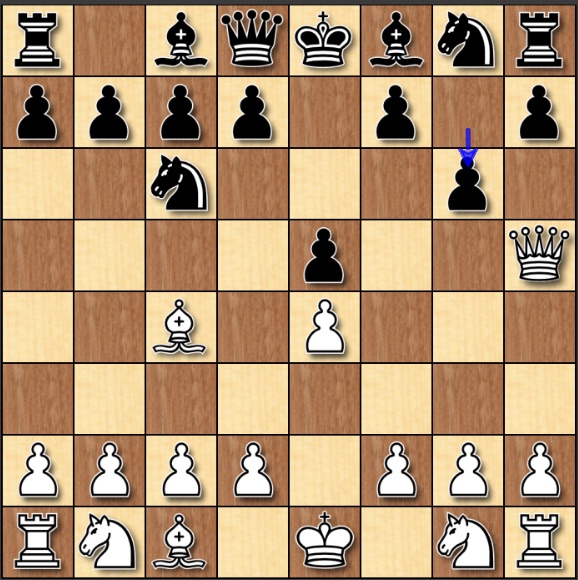
Now, the Scholars Mate
This is the Scholars Mate. 2. Qh5, bringing out the Queen early.
The plan is to put the light squared Bishop on the c4 square and threaten mate on f7 with the Queen. It is immediately worse for white in this position, but often players at a lower-level blunder.
For example: 1. e4 e5 2. Qh5 g6 3. Qxe5+ resulting in the loss of a Rook.

To easily crush players that try to gain a cheeky advantage in the opening you should instead defend your pawn, and then defend yourself from 3. Bc4, threatening mate threat.
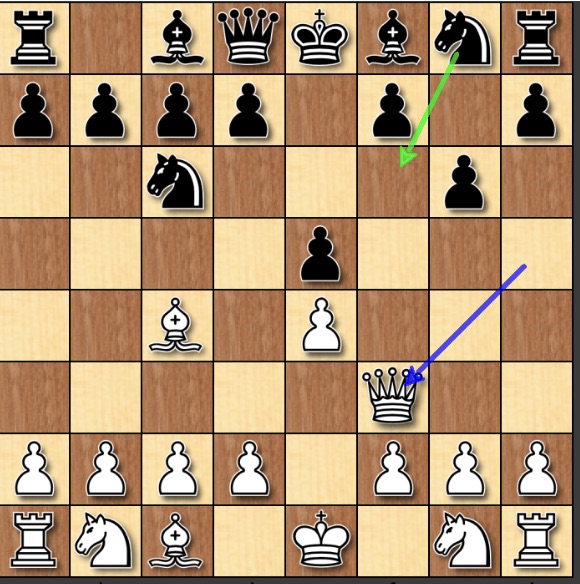
The best way to play this goes: 1. e4 e5 2. Qh5 Nc6 3. Bc4 g6 4. Qf3 Nf6
And black is immediately much better, with Bg7 and O-O coming. While white has wasted time and placed the Queen in front of their natural development square for the Knight.
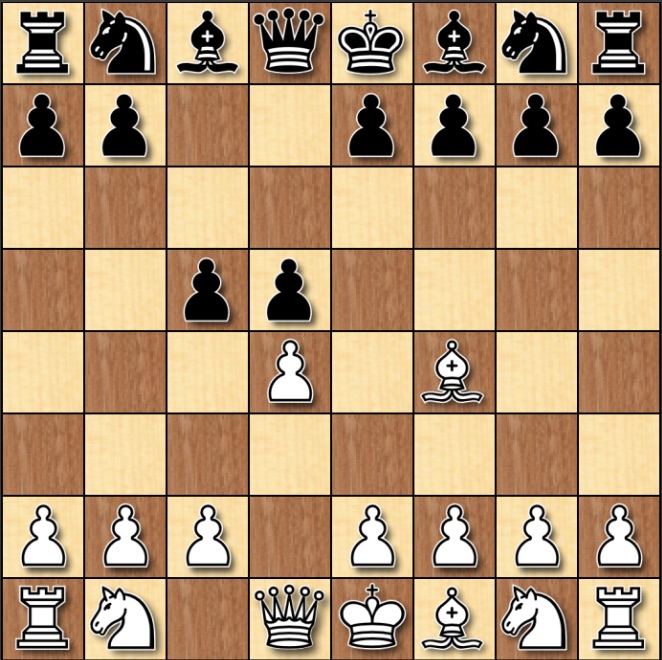
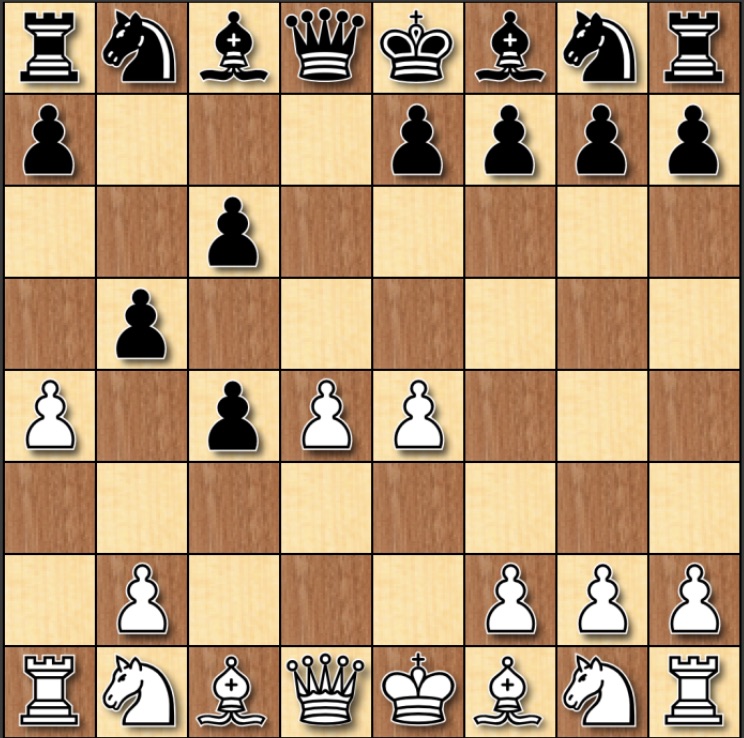
The most common opening within the 1. d4 openings is the London system, 2. Bf4. A very solid opening that tends to do well against anything you play into it.
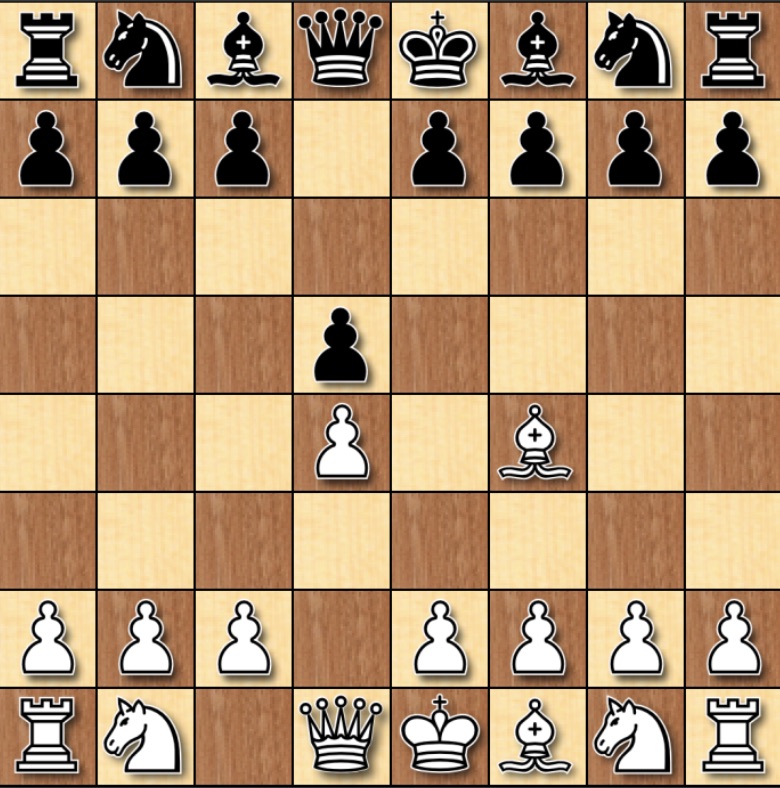
London players would love to get a system that looks like this:

Due to the flexibility of the opening, people that play the London often play only the London, and so the best way of dealing with this type of player is to ask questions of the position early and often, to try to interupt their natural flow. Theory suggests the best move for black is 2. ... c5.
This response to the London looks like it is giving away a pawn, but it is a pawn that can be won back for black very easily and if white plays 3. dxc4, they’ll be in a worse position immediately with black gaining the initiative in the position.

Here black has a very comfortable position after 1. d4 d5 2. Bf4 c5 3. dxc5 Nc6 4. Nf3 e6 5. e3 Nf6 6. Be2 Bxc5 7. O-O O-O, with an evaluation of even or slightly better for black.
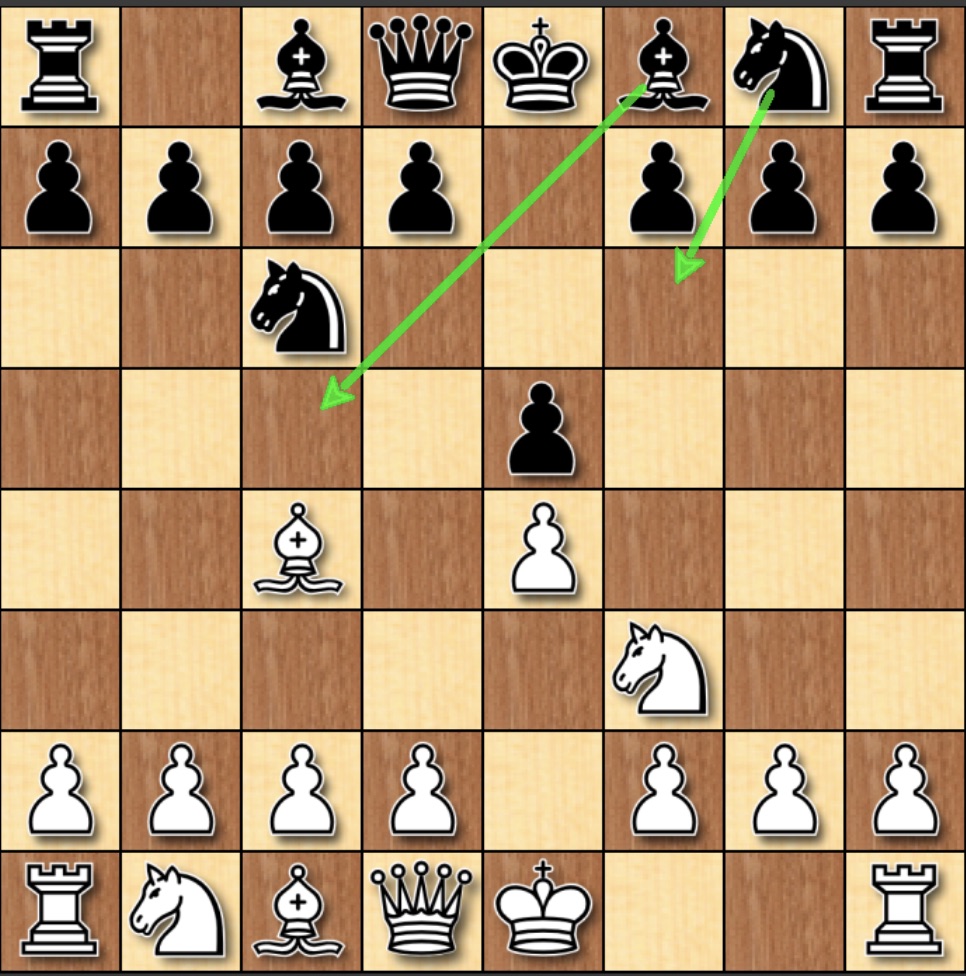
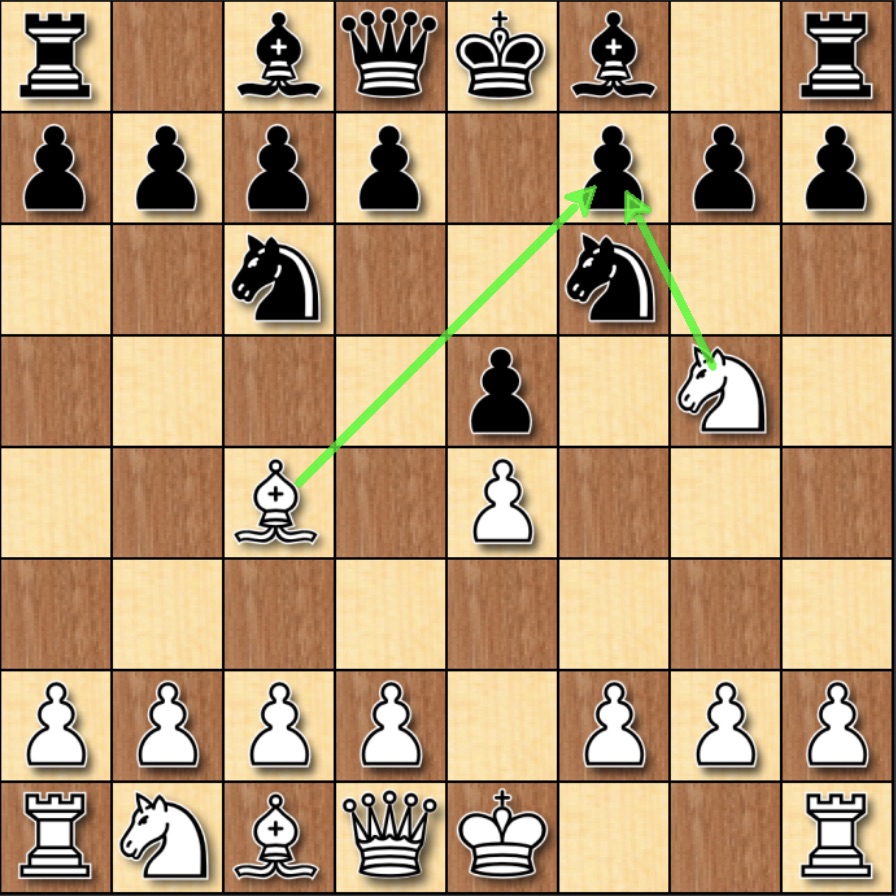
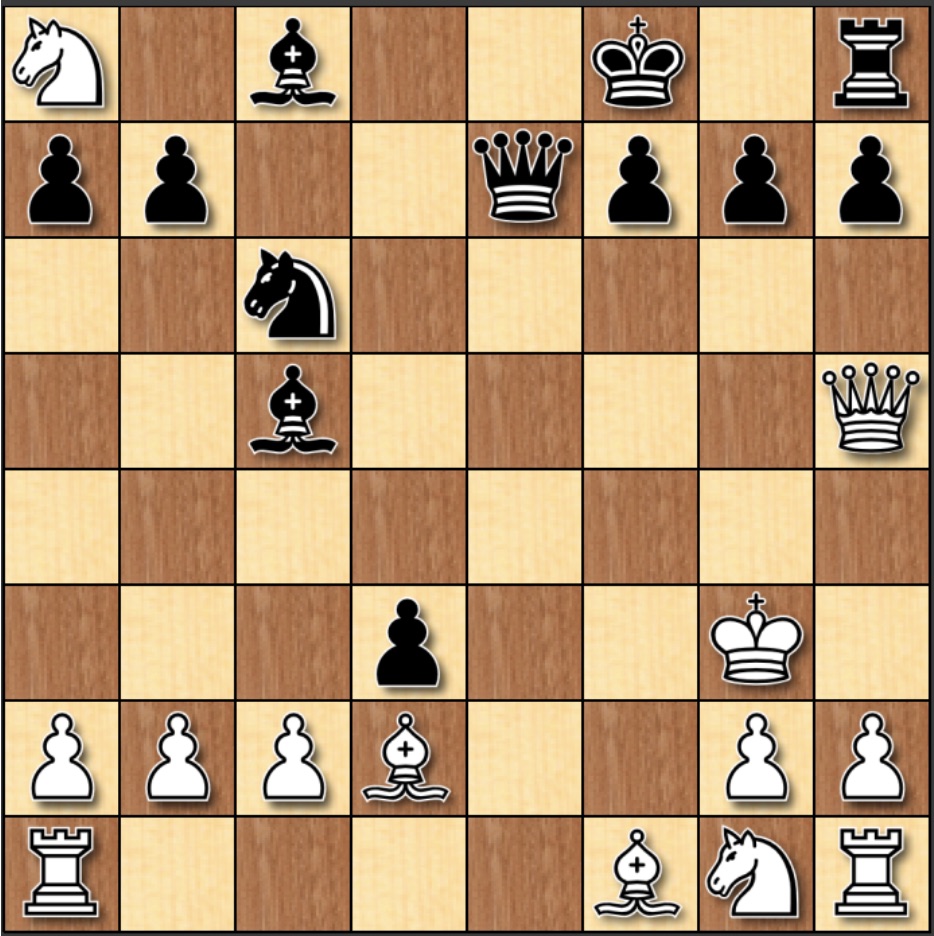
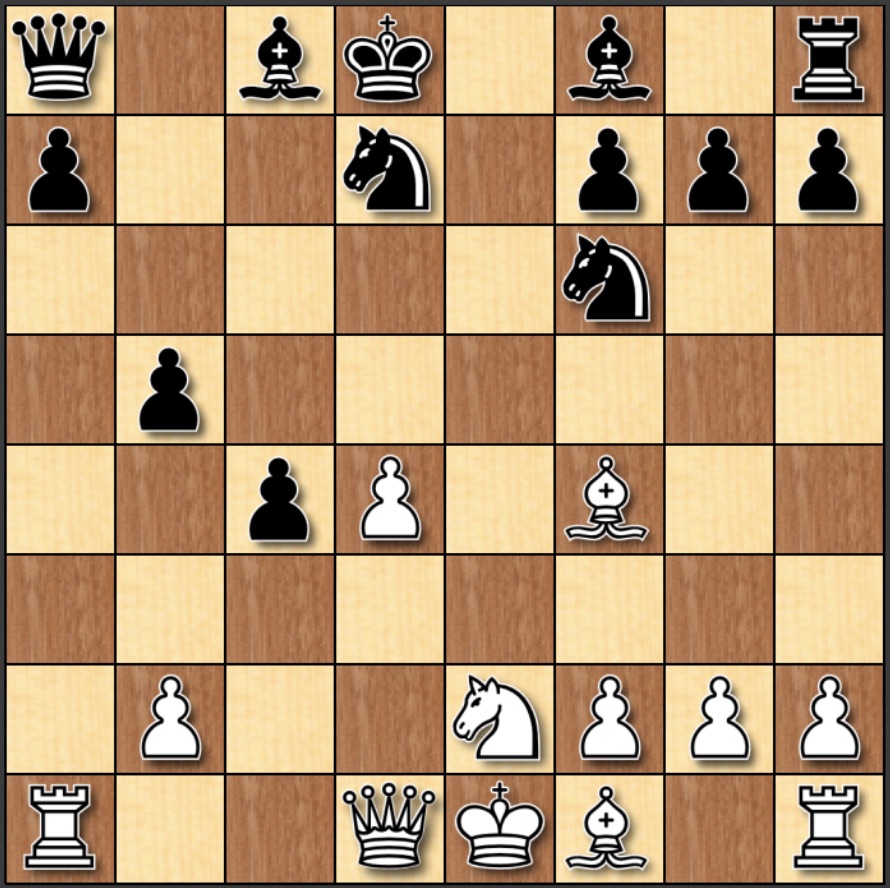
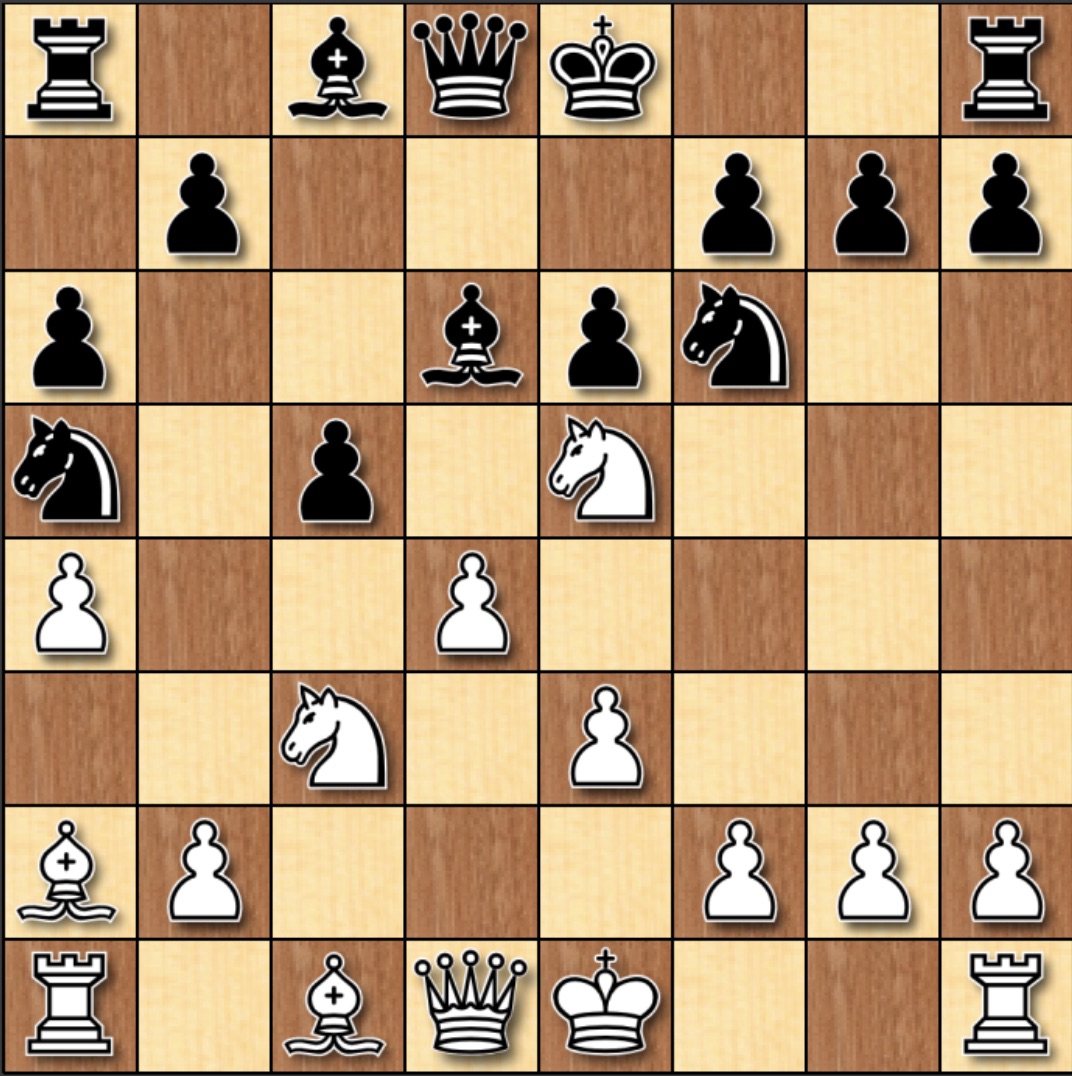
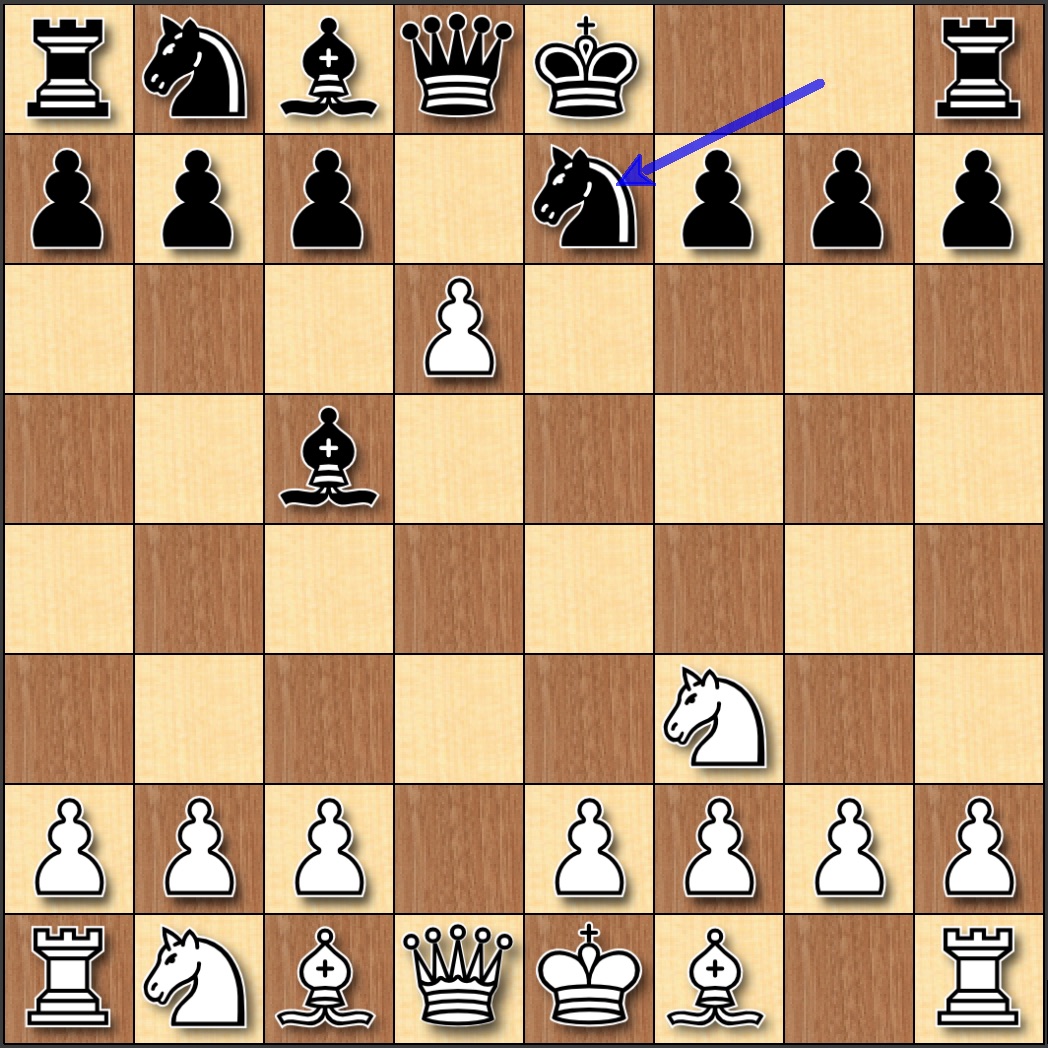
There are also complex positions within 3. dxc4, if white were to play the extremely combattive move; 4. e4
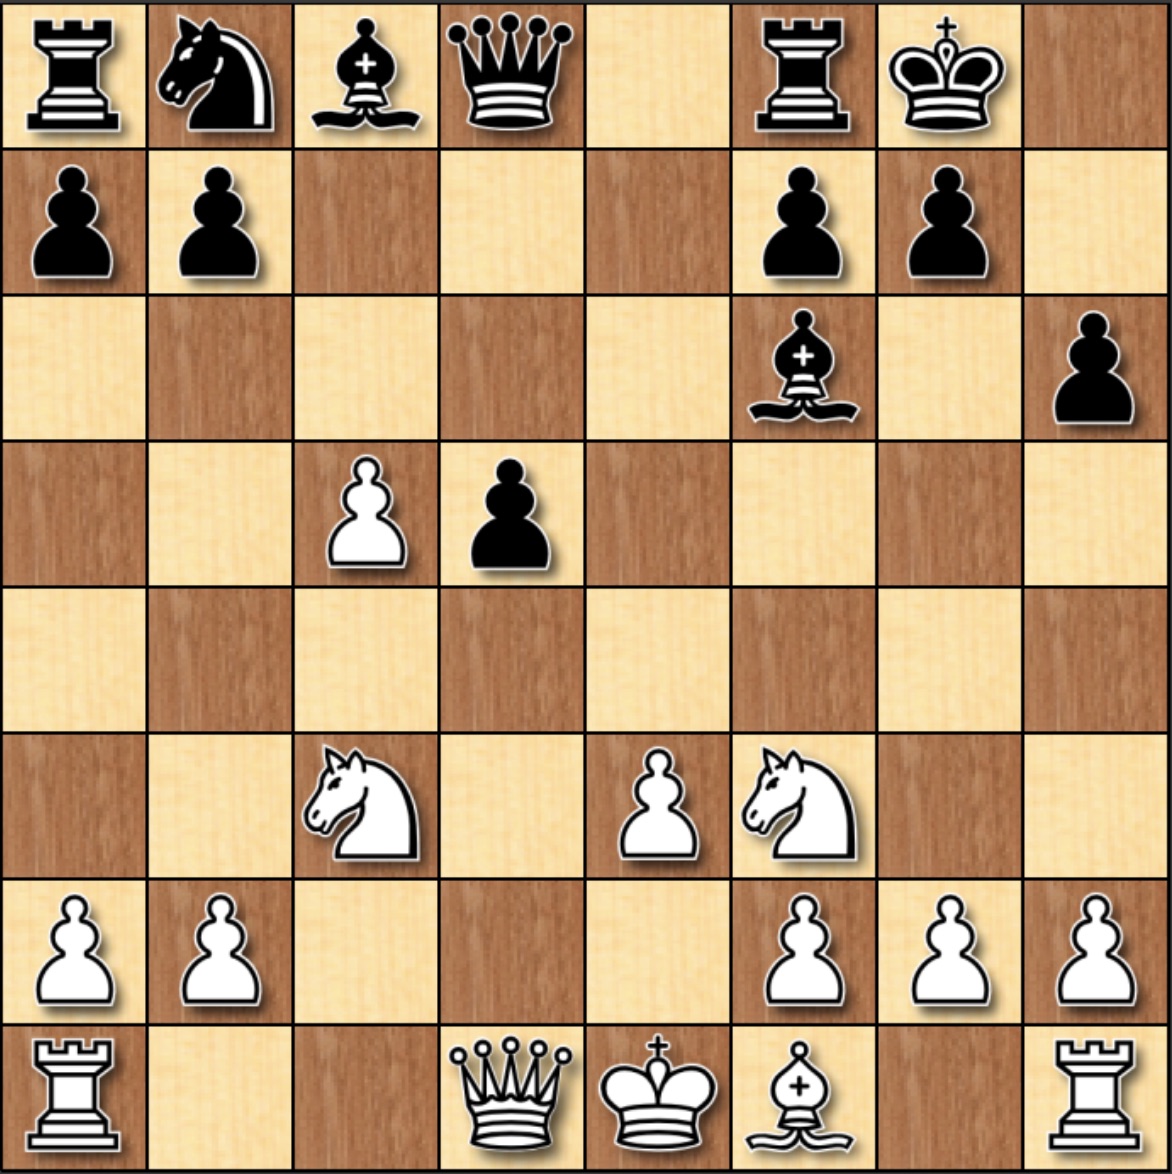
There is now a very interesting line: 1. d4 d5 2. Bf4 c5 3. dxc5 Nc6 4. e4 e6 5. exd5 exd5 6. Nc3 Nf6 7. Nb5 Bxc5 8. Nc7+ Kf8 9. Nxa8 Ne4 10. Be3 d4 11. Bd2 Nxf2 with the resulting position
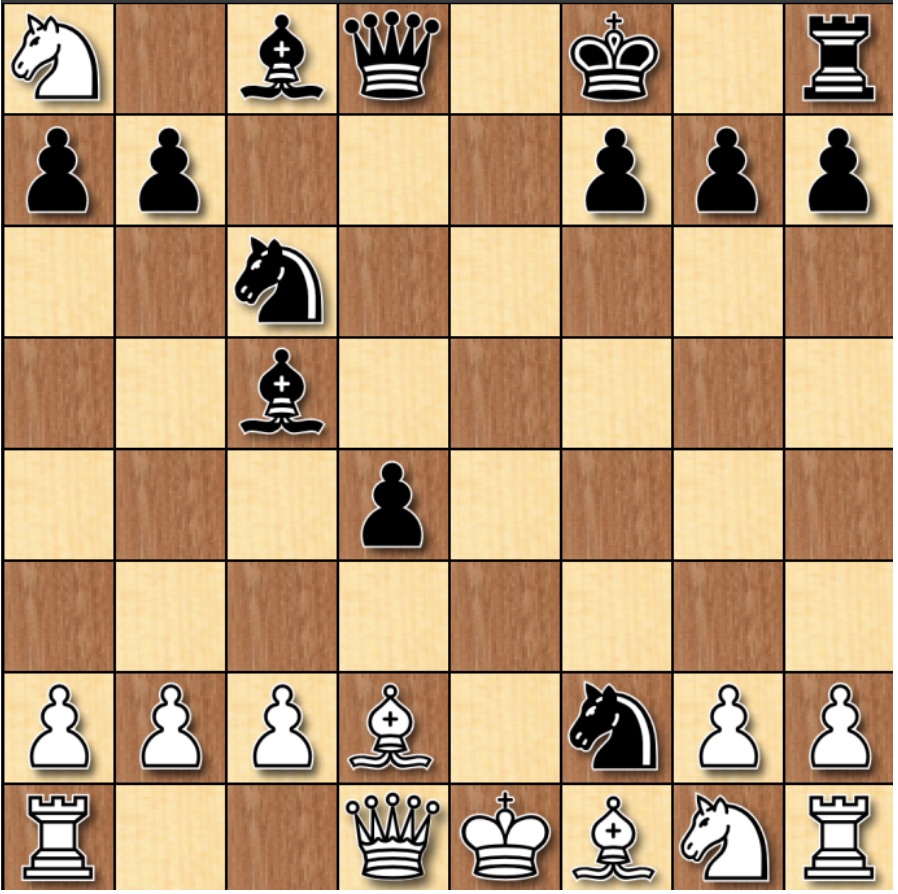
Here, black has lost a rook on a8 and is attempting to win the rook back by forking the queen and rook on the f2 square. At first glance this may look like the loss of a knight, but after kxf2 there is a devastating attack on the white king after;
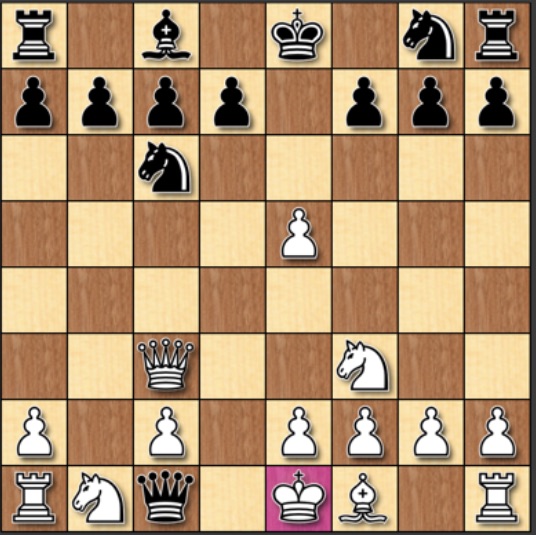
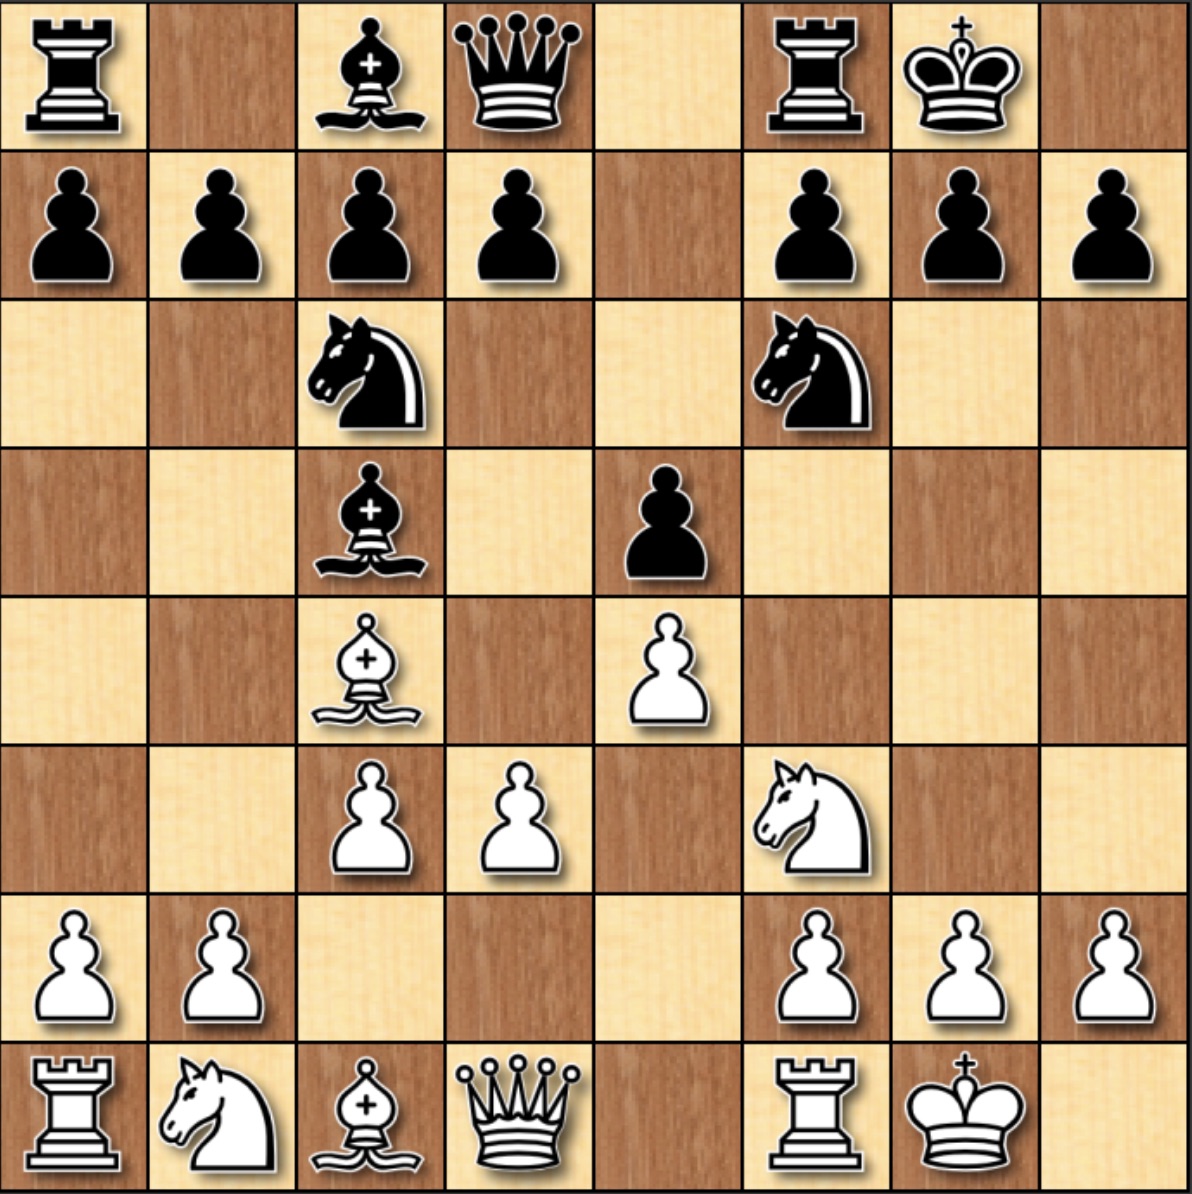
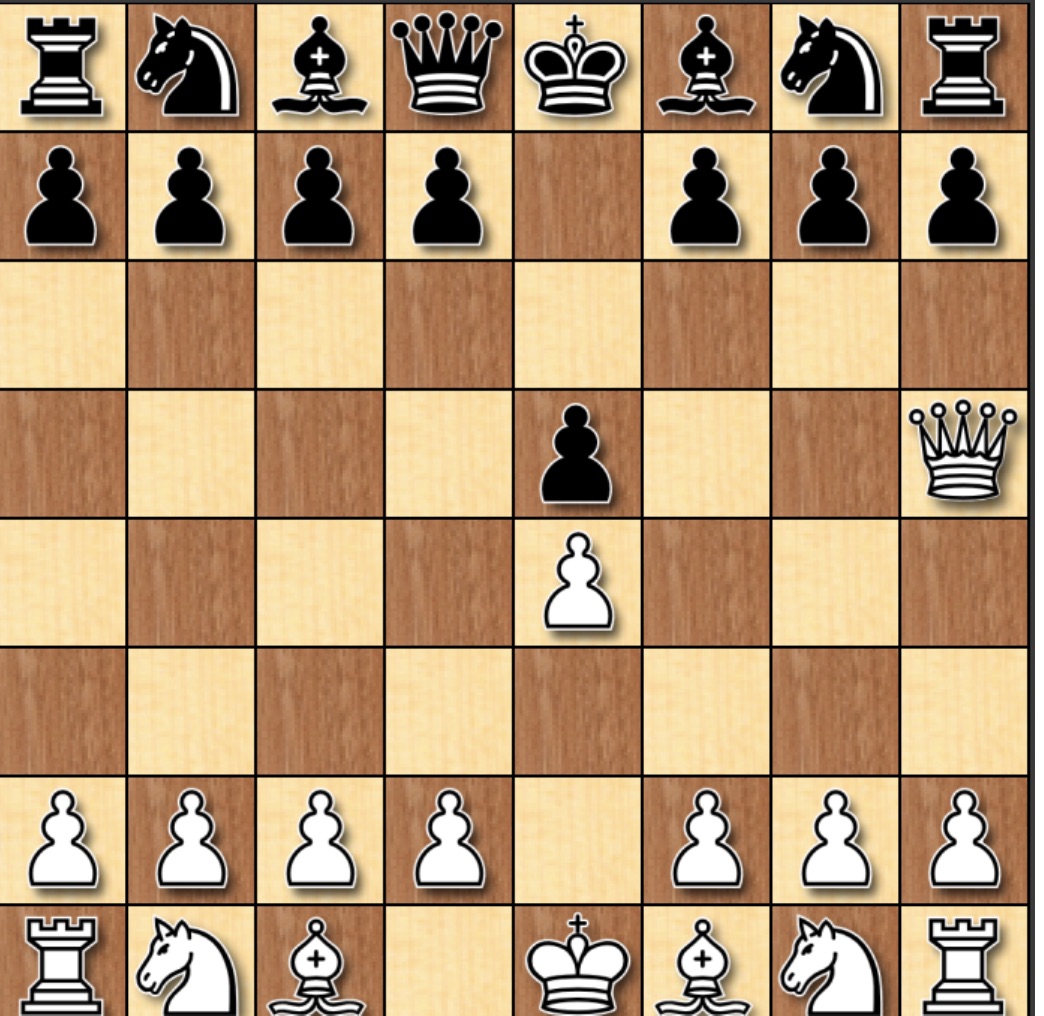
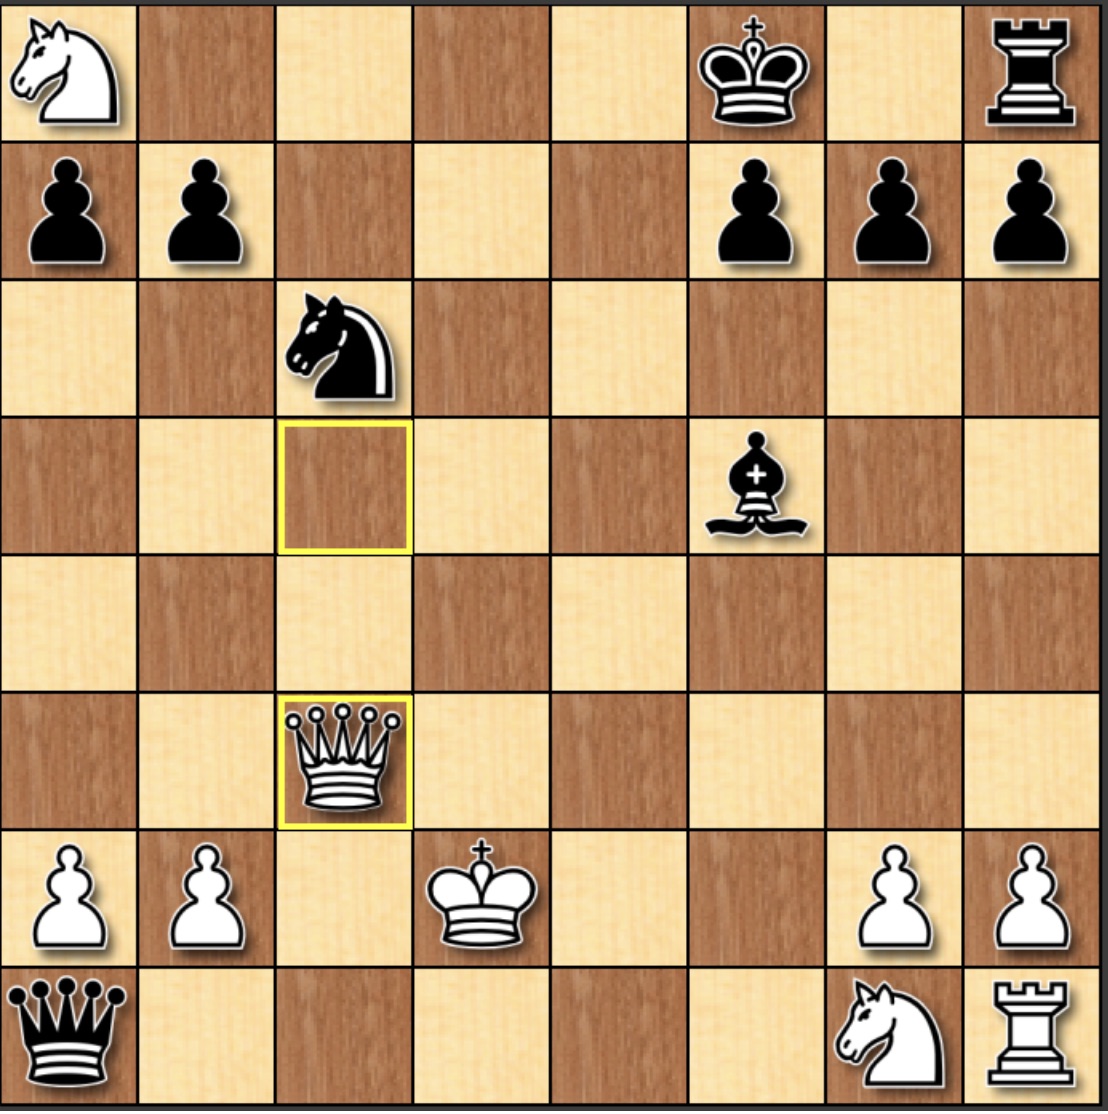
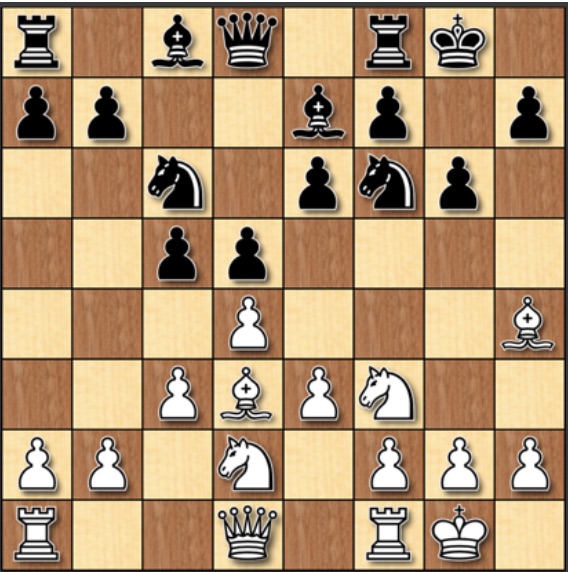
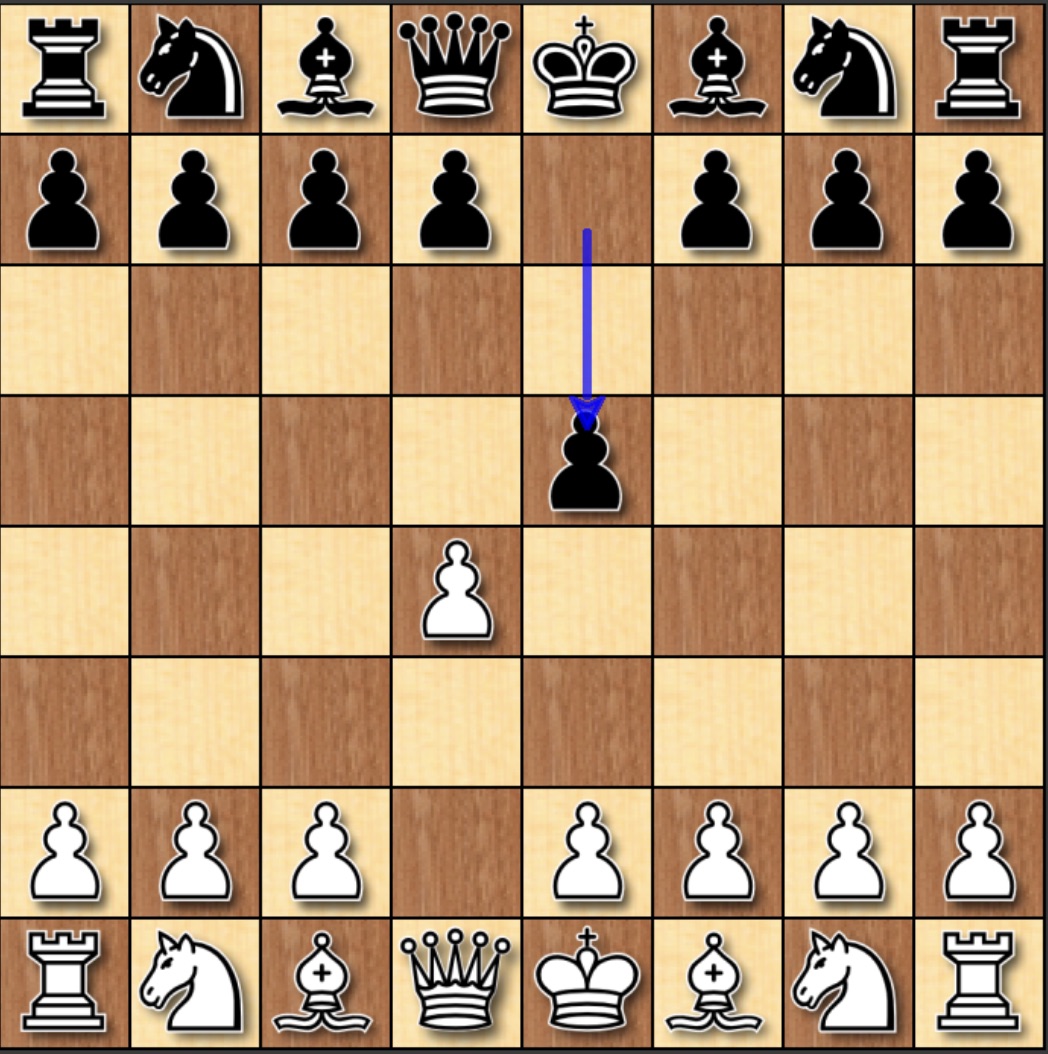
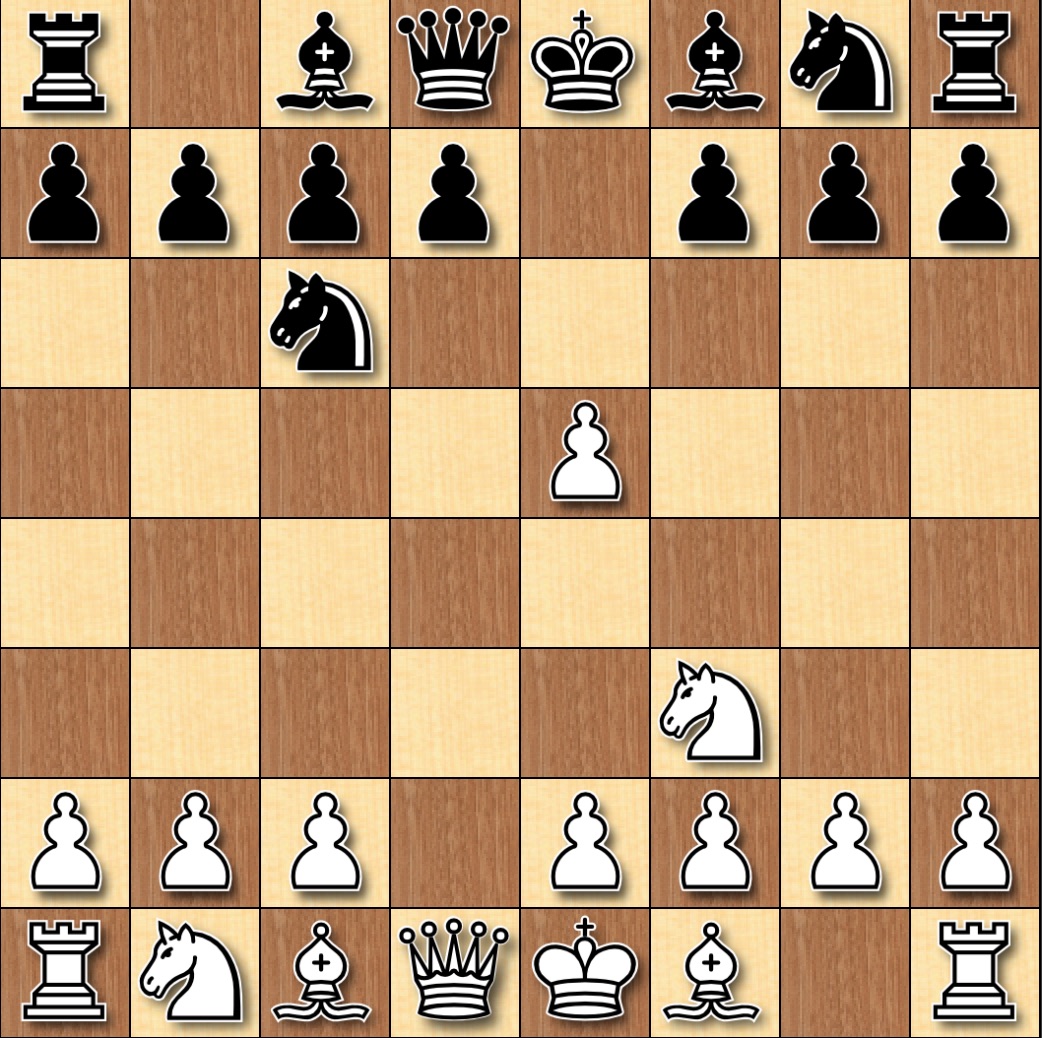
12. Kxf2 d3+ 13. Be3 Bxe3+ 14. Kxe3 Qd4+ 15. Kd2 dxc2+ 16. Kxc2 Bf5+ 17. Kc1 Qf4+ 18. Qd2 Qxf1+ 19. Qd1 Qf4+ 20. Qd2 Qf1+ 21. Qd1 Qf4+ 22. Qd2 Qc4+ 23. Qc3 Qf1+ 24. Kd2 Qxa1
With the resulting position and an evaluation of -5, winning for black:
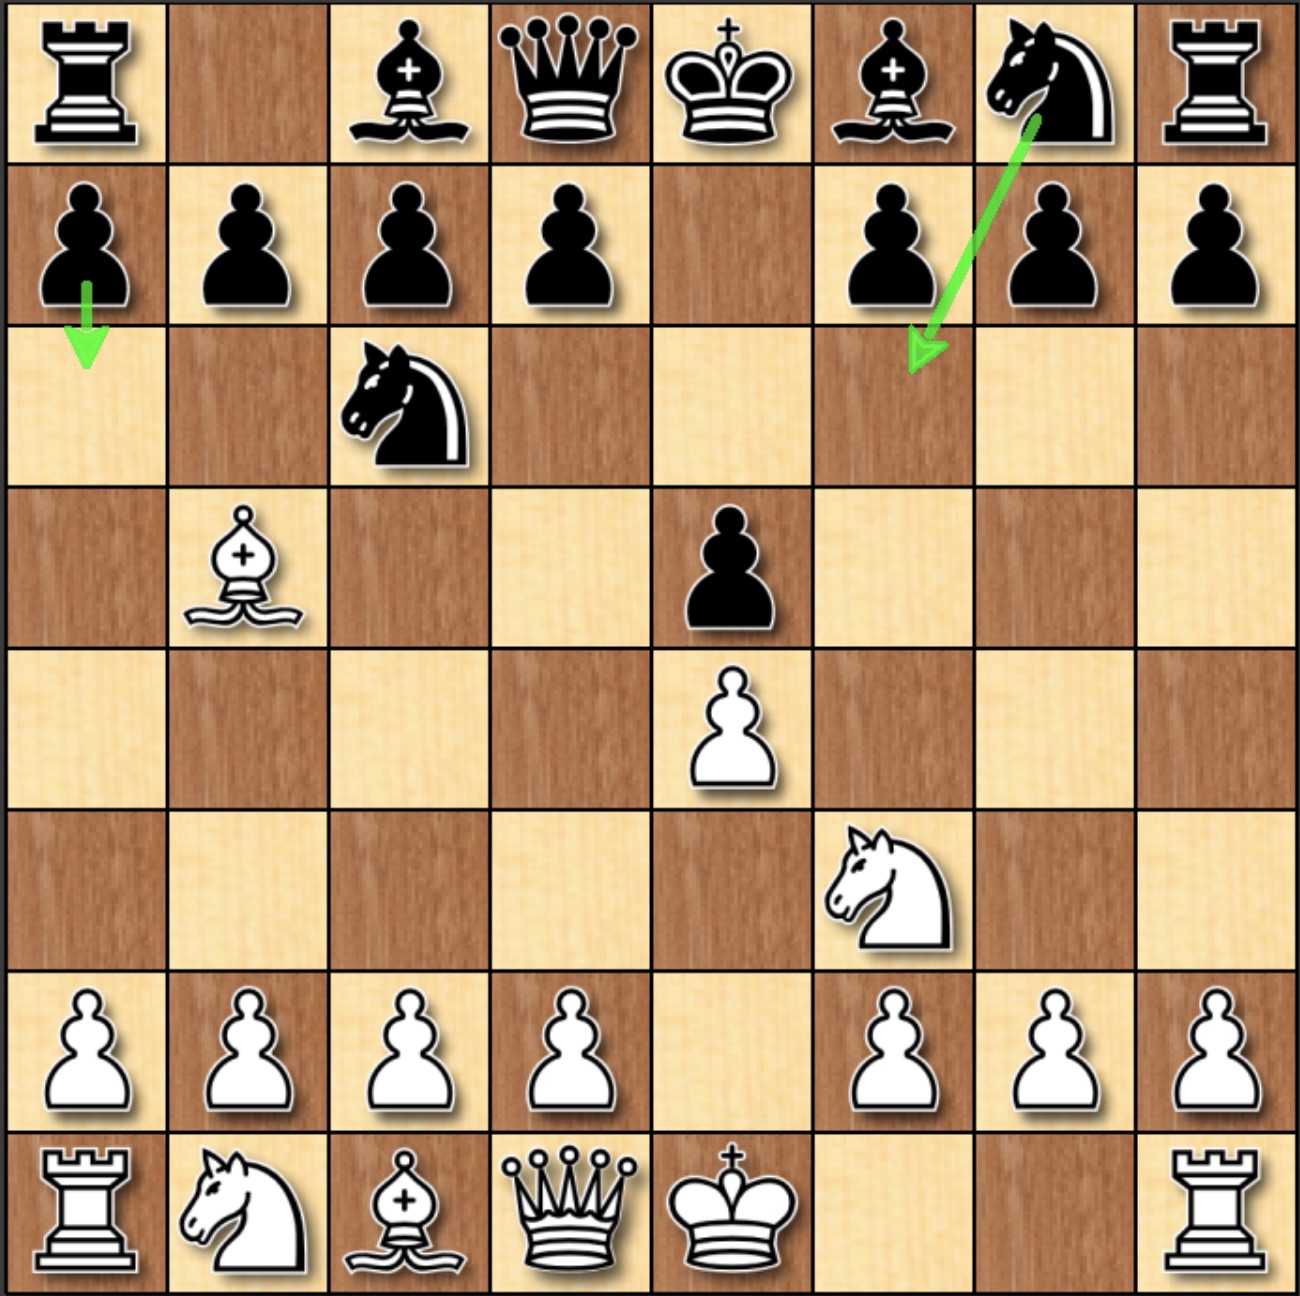
But because 12. Kxf2 is not forced, white has a single move that maintains equality within the position:
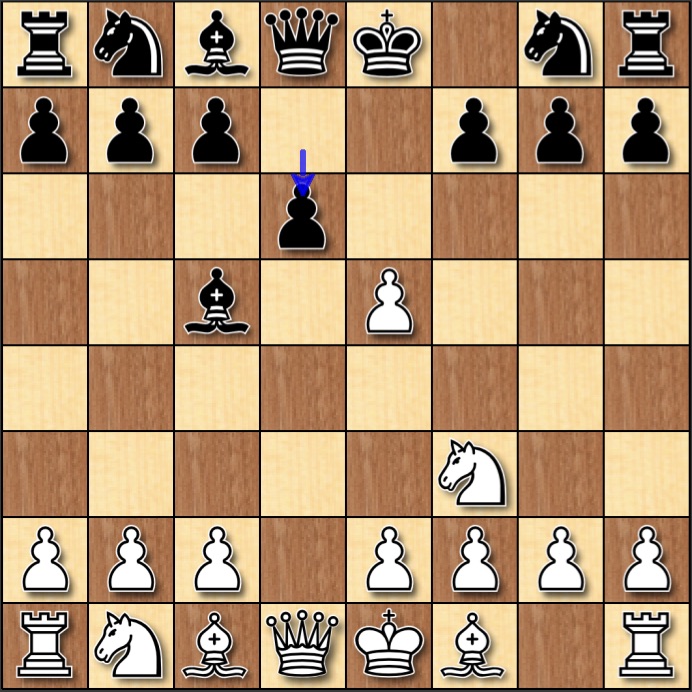
12. Qh5. Qe2 and Qf3 don’t lose on the spot, but hand over a winning advantage to black.
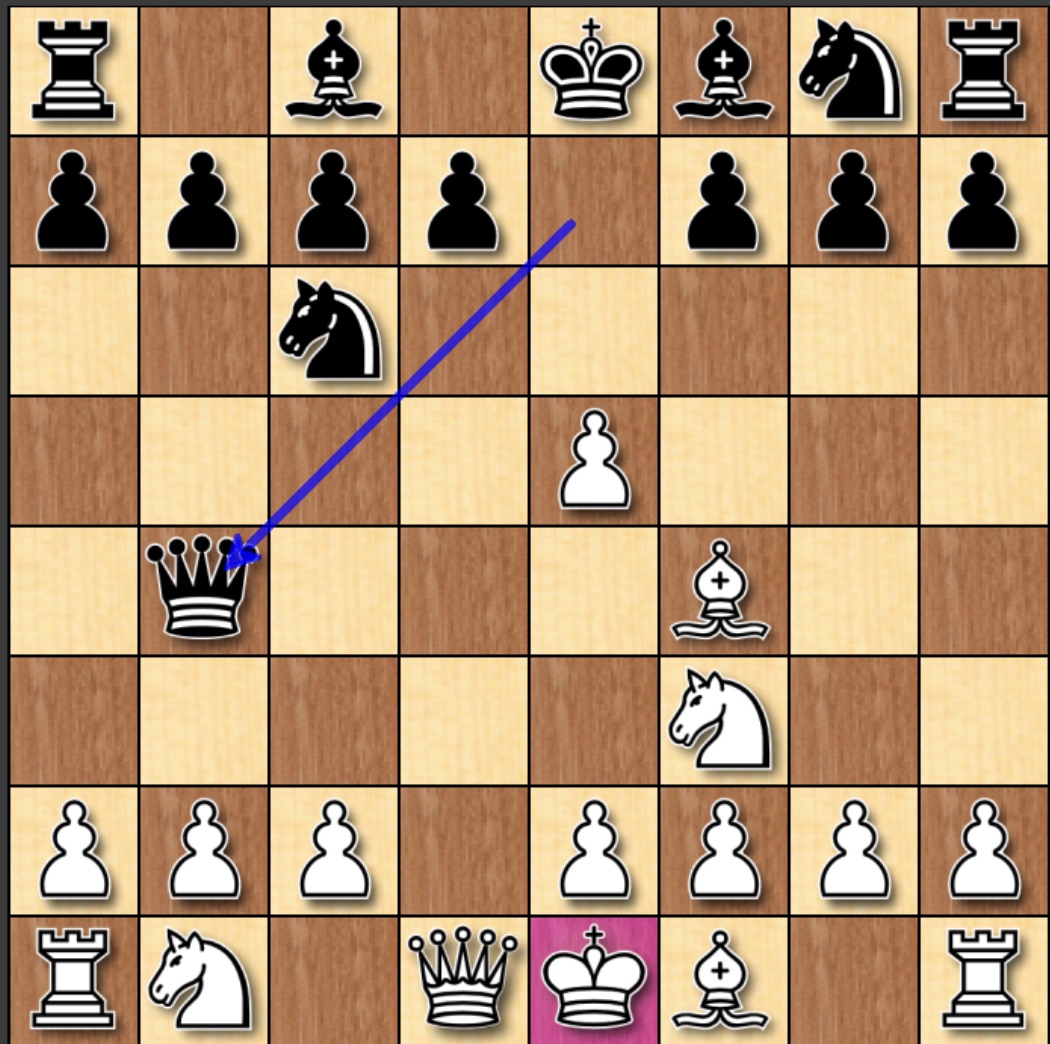
After 12. Qh5, 12. ... Qe7+ 13. Kxf2 d3+ 14. Kg3 Bd6+ 15. Kf2 Bc5+ 16. Kg3 Bd6+ 17. Kf2 Bc5+ 18. Kg3
Here, the game ends in a draw. Kg3 and Kf2 are the only moves, as blocking with the bishop leads to a forced mate in 10 for either and anything else for black loses on the spot. The conclusion of this line is important because you cannot expect your opponent to play anything other than the best move and should understand that this line played properly is evaluated at exactly 0.0 for the course of the entire game, with the other side seizing a winning advantage if someone plays an incorrect move.
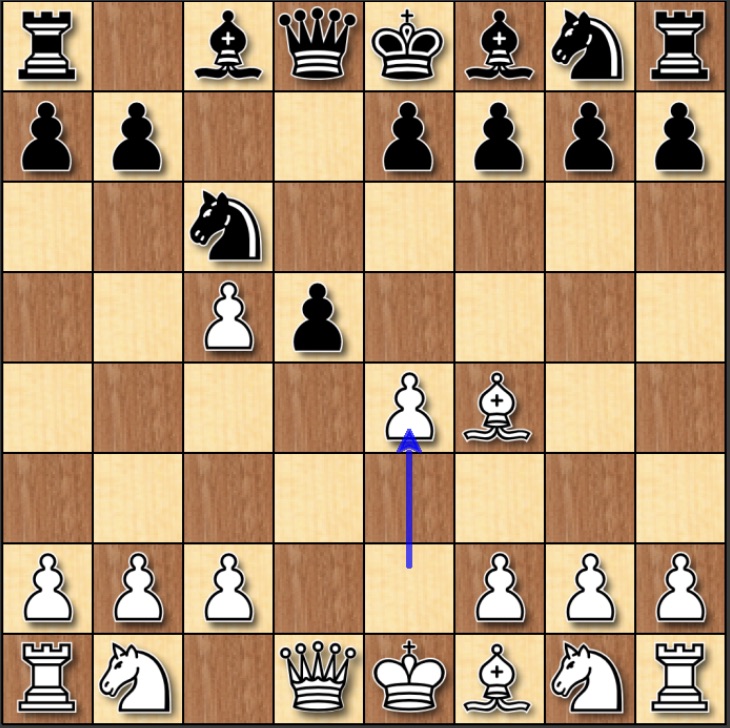
Taking the c5 pawn ins't whites best response 2. ... c5: That would be: 3. e3
Where white continues with the normal development in the London system, and black continues to develop as well.
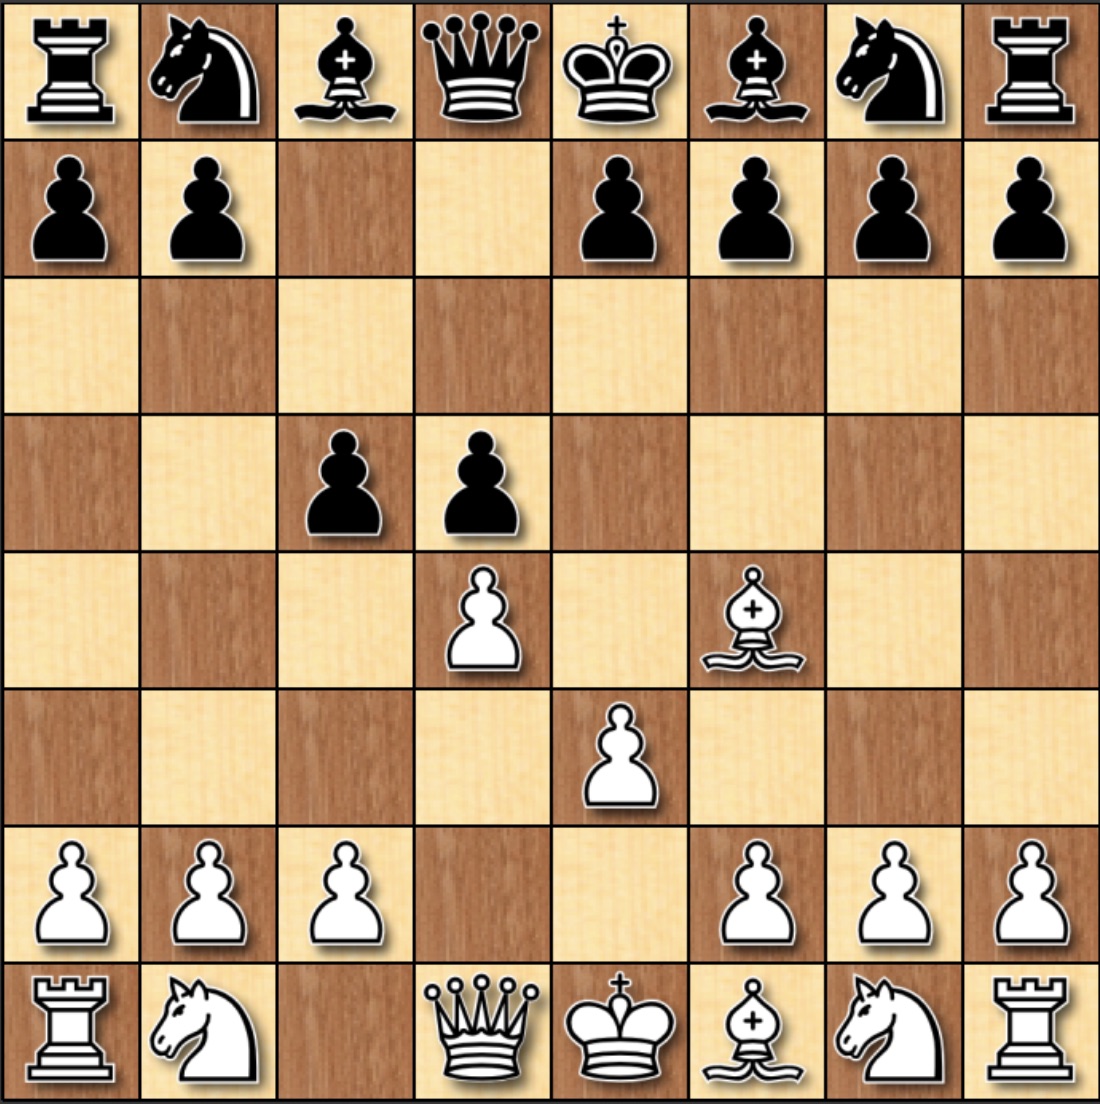
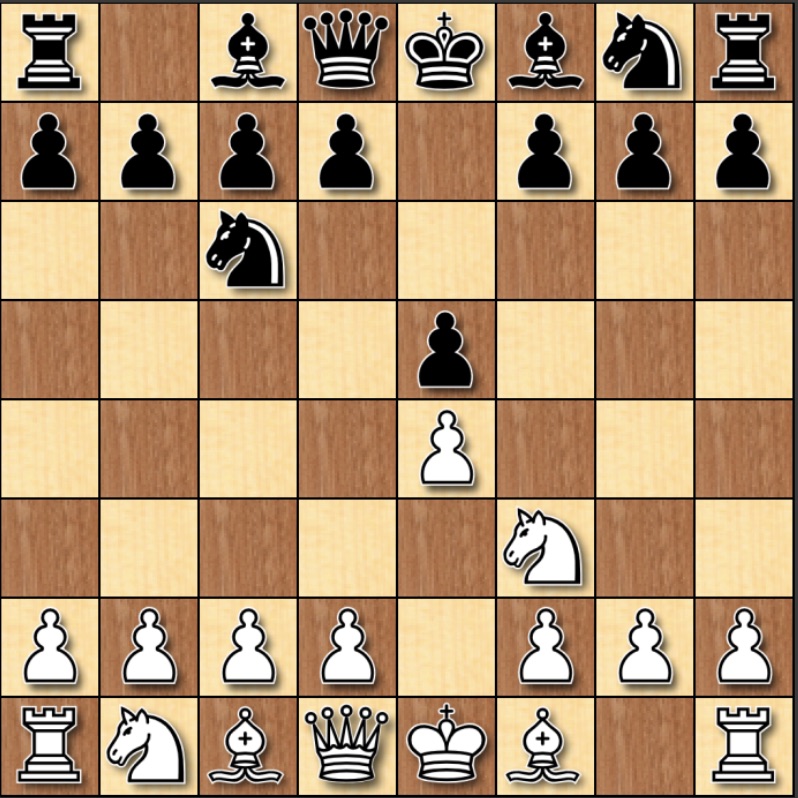
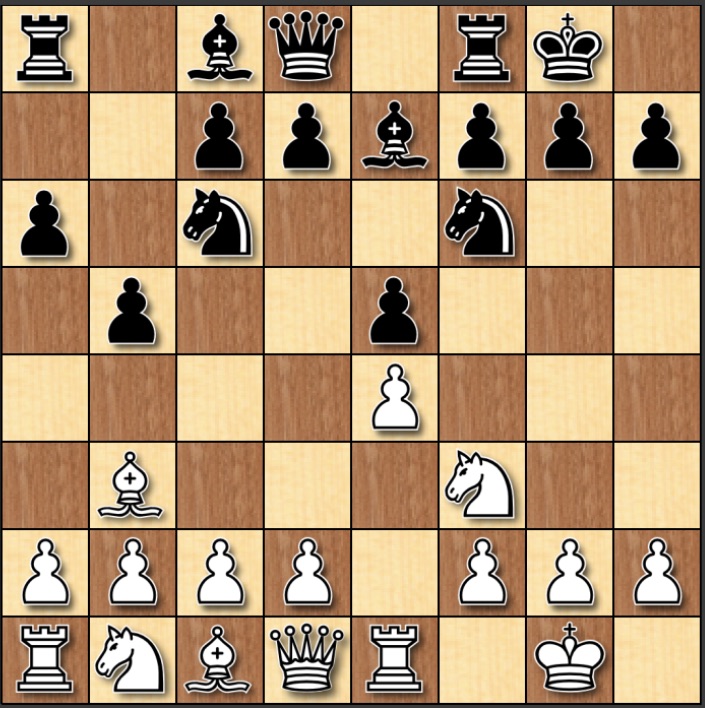
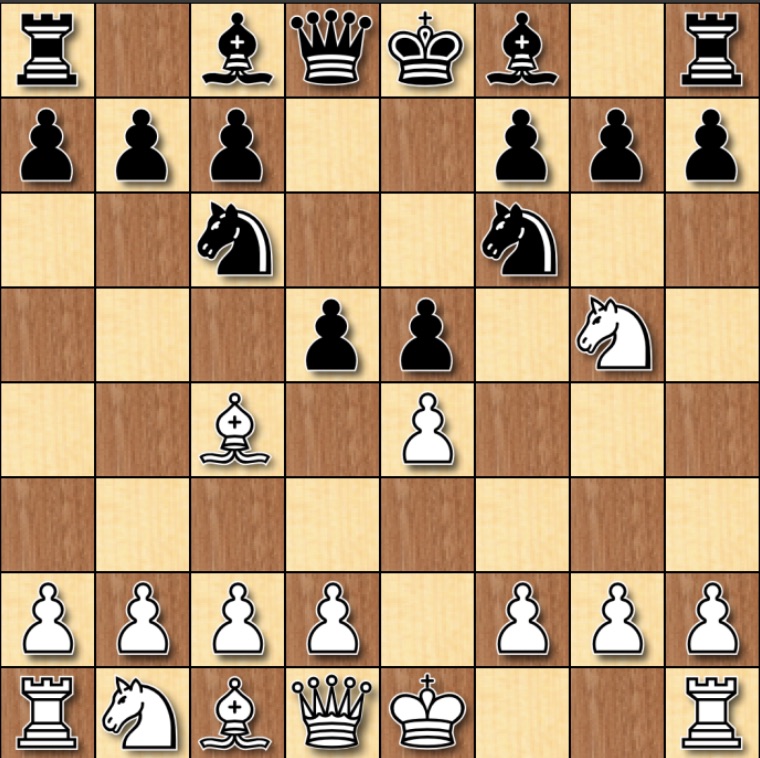
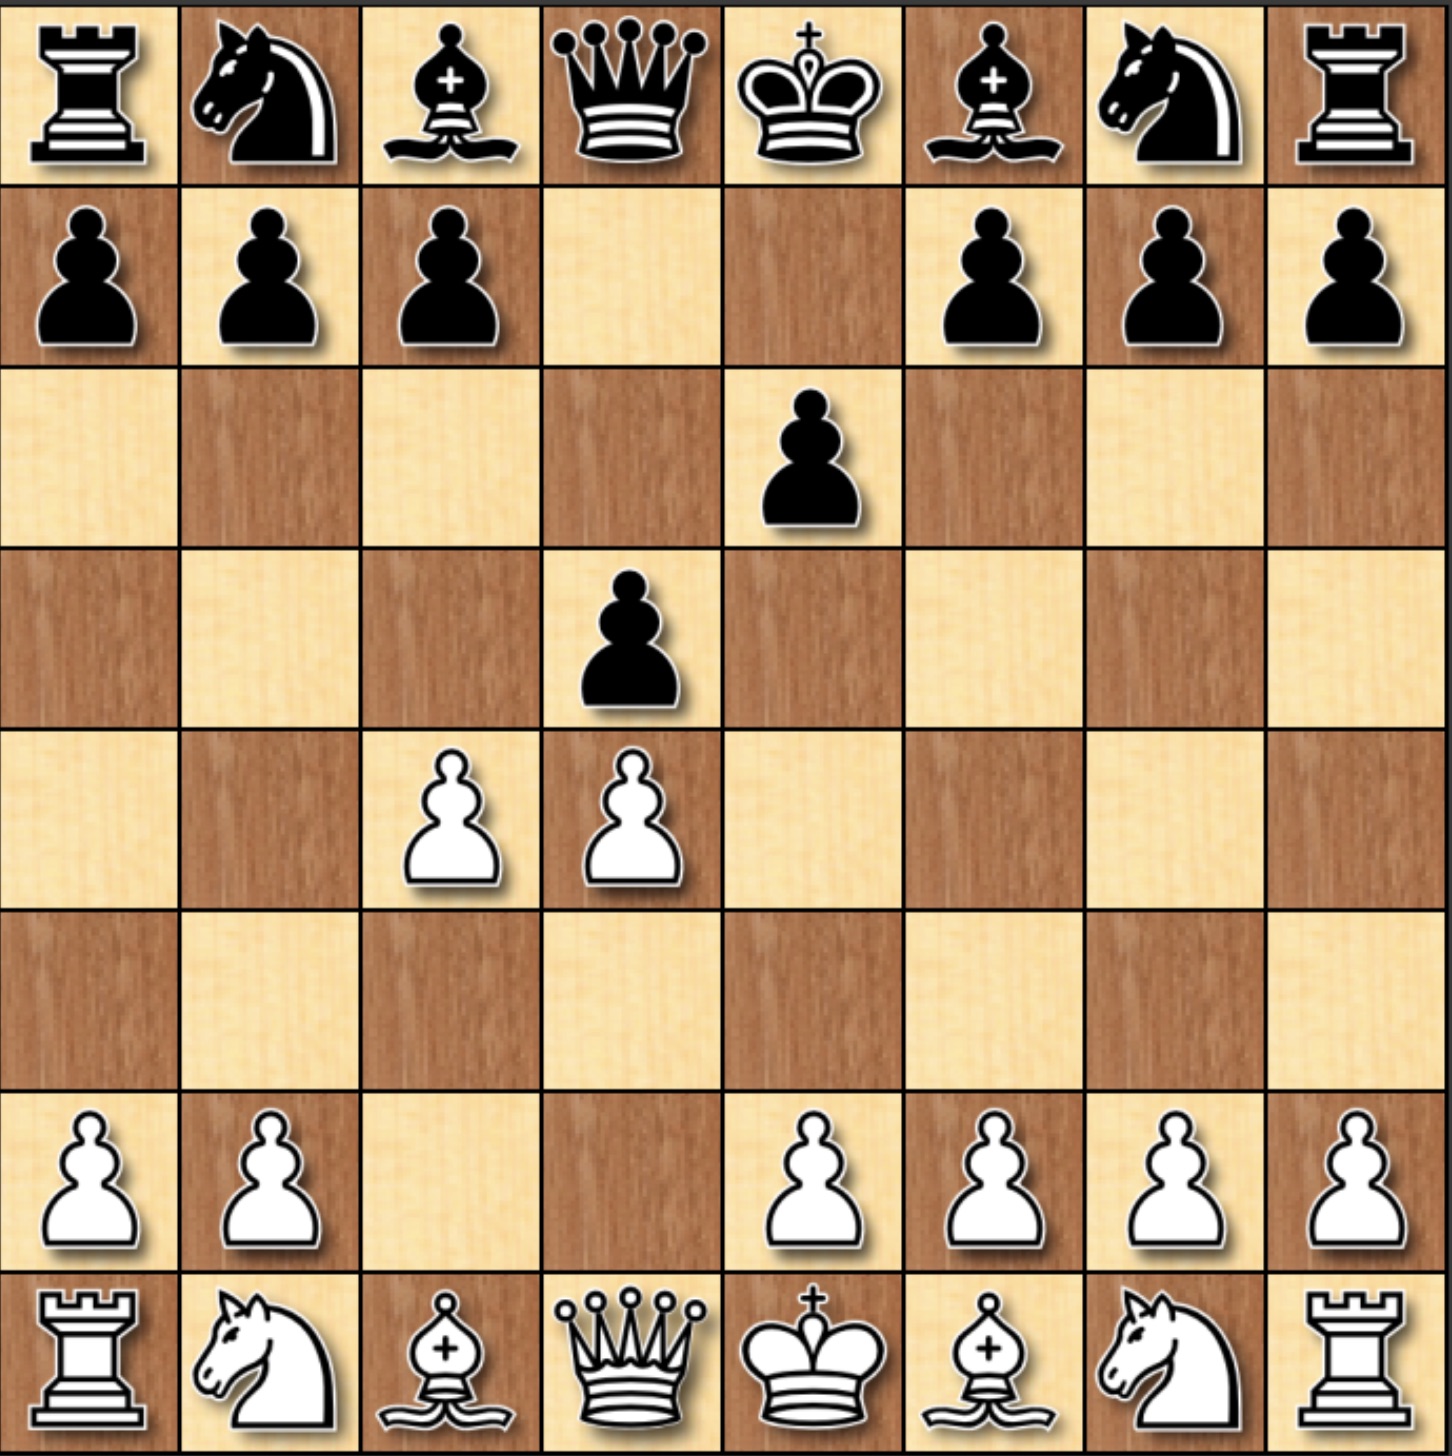
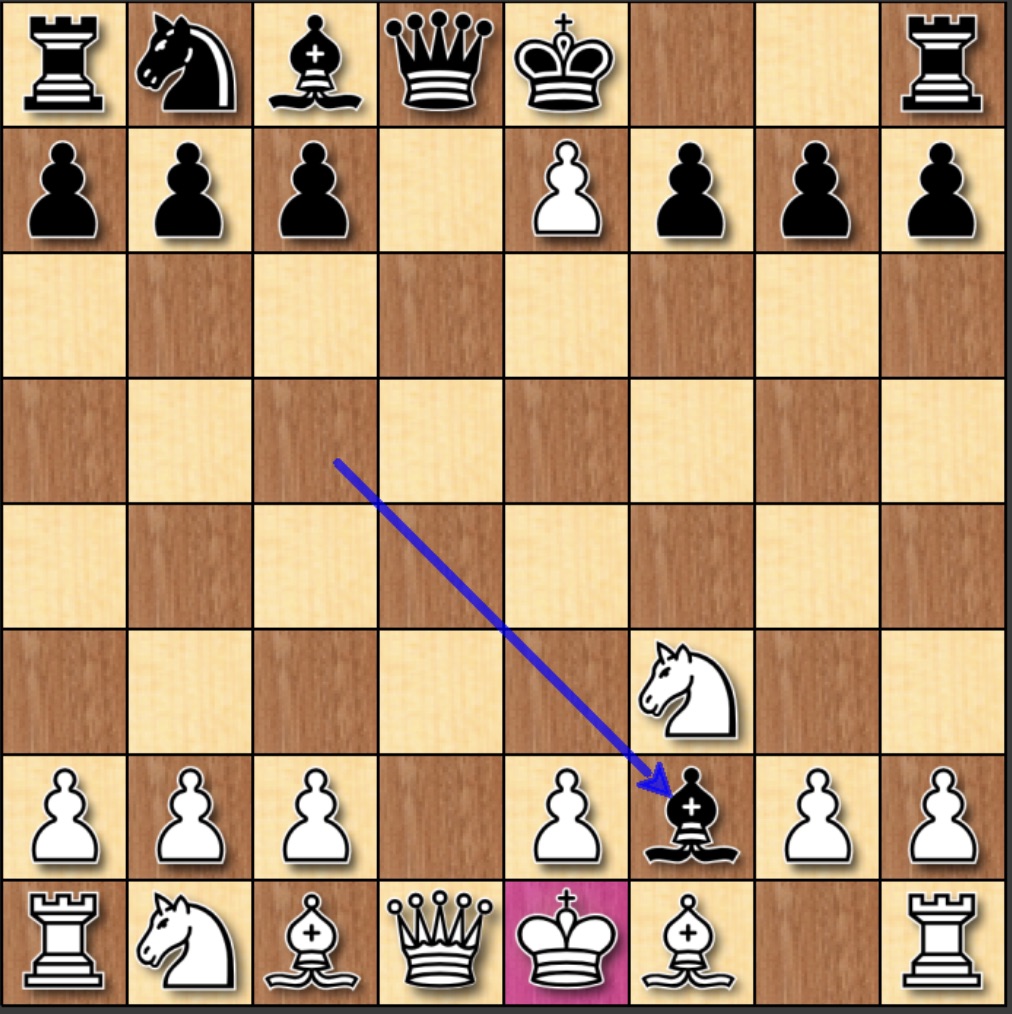
After the continuation: 1. d4 d5 2. Bf4 c5 3. e3 Nf6 4. Nf3 Nc6 5. Nbd2 e6
You would reach the following position.
Where white must play the move 6. c3, instead of the normal developing move in the London, 6. Bd3
If white plays 6. Bd3 then 6. ... Qb6 is a very annoying threat to the white position that is difficult to deal with and black seizes the advantage.
Otherwise, the game continues into a balanced midgame.
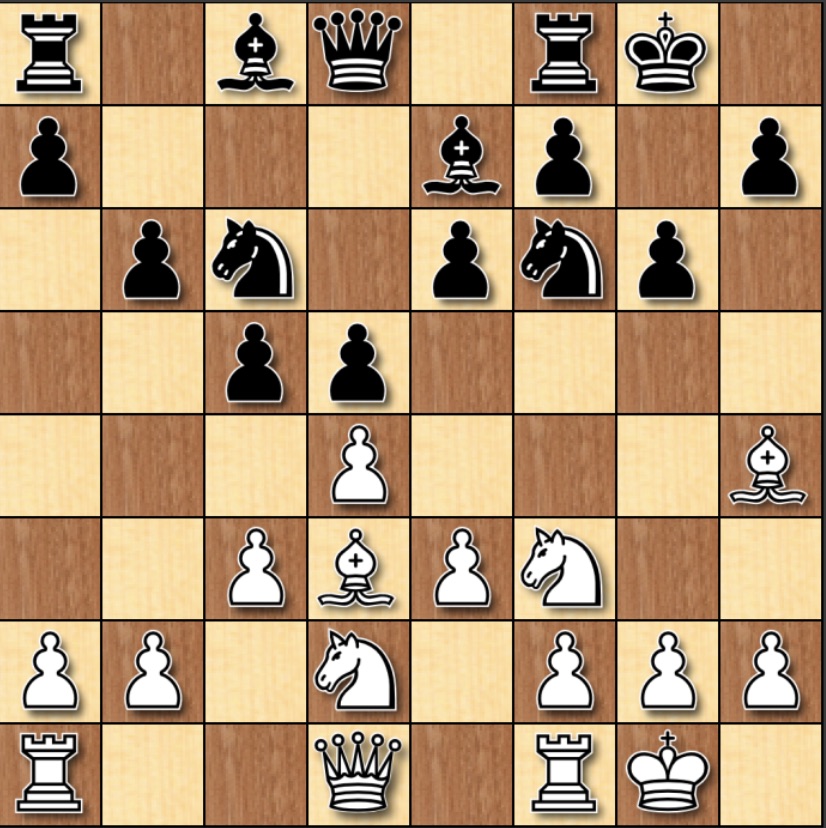
1. d4 d5 2. Bf4 c5 3. e3 Nf6 4. Nf3 Nc6 5. Nbd2 e6 6. c3 Bd6 7. Bg3 O-O 8. Bd3 g6 9. Bh4 Be7 10. O-O b6
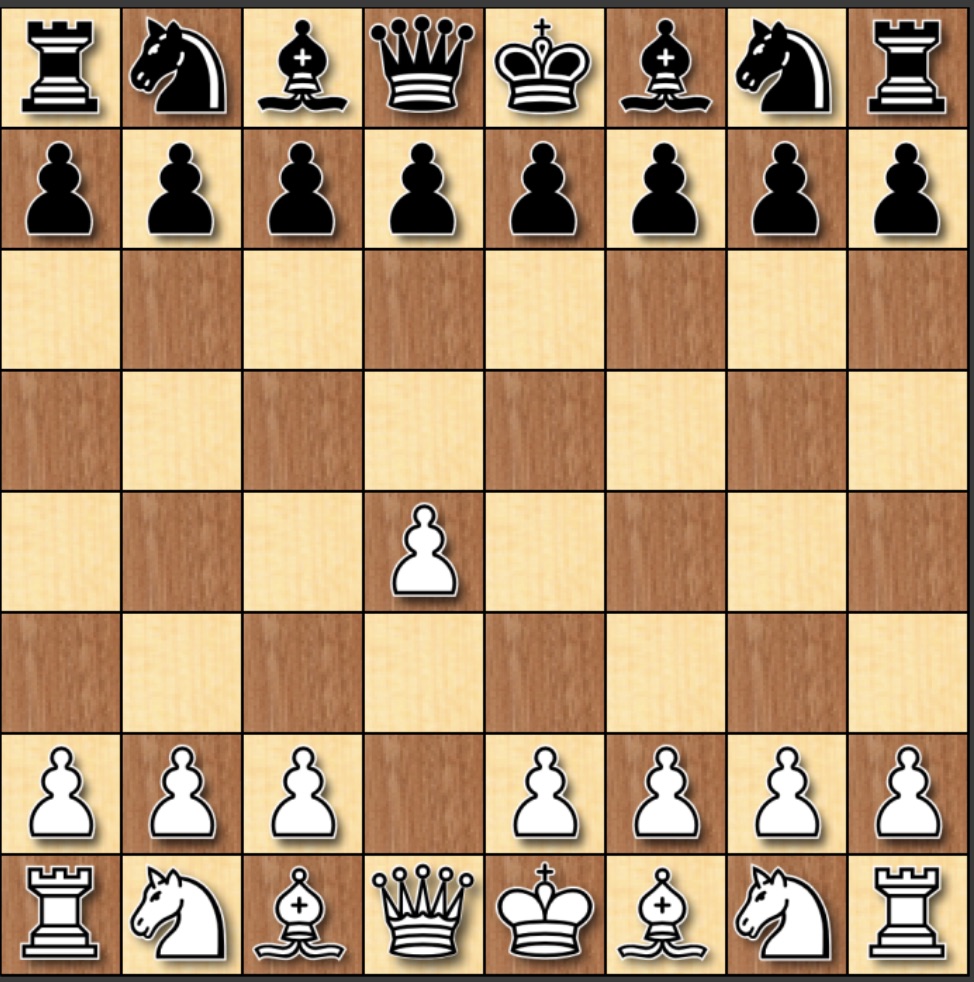
The next most common 1. d4 opening is the Queens Gambit (Although far more popular between experienced players)
The point of this opening is to temporarily gambit a pawn to seize control of the center of the board.
There is a large amount of theory when it comes to the Queens Gambit, the two main responses from black are 2. ... dxc4, the Queens Gambit Accepted and 2. ... e6, the Queens Gambit Declined.
The Queens Gambit Accepted has less theory. The idea is that after 2. ... dxc4 white can play 3. e4.
This seizes control of the center of the board, And the pawn on c4 is not defendable by black.
If black tries to defend the pawn with 3. ... b5 or Be7, white can continue to push the issue and develop.
Here white has a clear advantage and a much more comfortable position, with the main line continuation from here being:
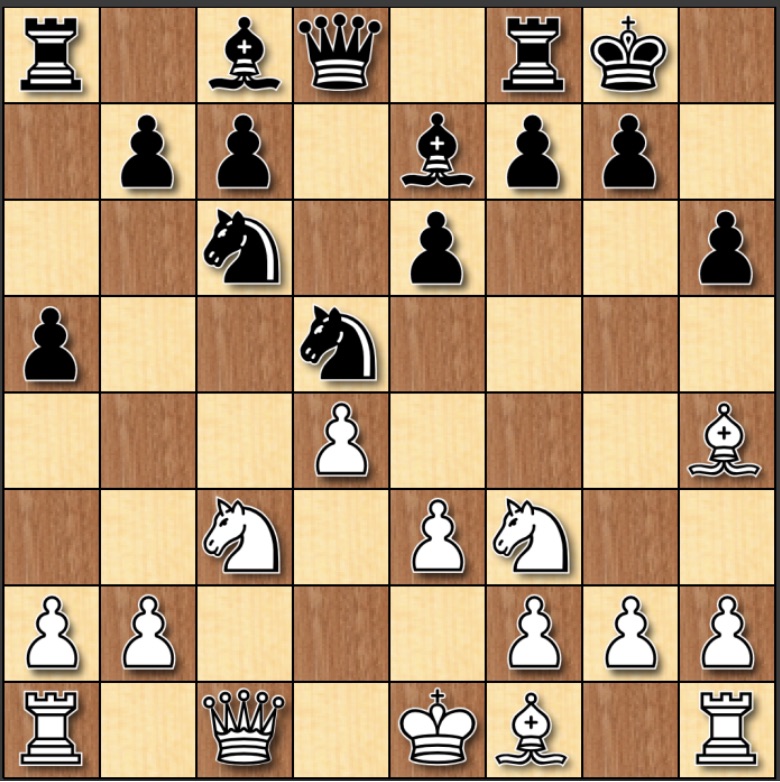
1. d4 d5 2. c4 dxc4 3. e4 b5 4. a4 c6 5. axb5 cxb5 6. Nc3 Qb6 7. Nd5 Qb7 8. Bf4 e5 9. Bxe5 Nd7 10. Bf4 Ngf6 11. Nc7+ Kd8 12. Nxa8 Qxe4+ 13. Ne2 Qxa8
3. e4 is not always whites response to 2. ... dxc4, the move 3. Nc3 is a common move in response as well, although not the best move.
White is thought to still maintain a slight advantage, but it is hard to prove, and the position is often considered equal here after the move 3. ... a6 by black and the continuation:
1. d4 d5 2. c4 dxc4 3. Nc3 a6 4. Nf3 e6 5. a4 Nc6 6. e3 Na5 7. Ne5 Nf6 8. Bxc4 Bd6 9. Ba2 c5
Where the game continues here into a balanced midgame after 10. O-O O-O.
This is seen as the better response to 2. c4 and has far more theory.
One of the most common lines follows the continuation: 1. d4 d5 2. c4 e6 3. Nc3 Nc6 4. Nf3 Nf6 5. Bg5 Be7 6. e3 O-O 7. Qc1 h6 8. Bh4 a5 9. cxd5 Nxd5
Where both sides are balanced, but white has a slight edge.
A different variation can be reached after 3. ... c5. This variation has more tactical play but is still very solid.
The mainline continuation would be as follows:
1. d4 d5 2. c4 e6 3. Nc3 c5 4. cxd5 exd5 5. Nf3 Nf6 6. Bg5 Be7 7. dxc5 O-O 8. e3 h6 9. Bxf6 Bxf6
Here the position is slightly unbalanced with white better but both sides maintain plenty of play available.
Englund Gambit is just about the only 1. d4 trick you’ll see, and it can be very annoying if you get tricked by it.
There are two basic variations. Both start like this:
Unlike the Queens Gambit this is just the loss of a pawn by black
The main line usually follows a move order similar to:
This is a free second pawn.
The tricky move comes with 4. ... Ne7, which looks like a free knight, but if you take it...
Black has this devasting move, winning your Queen.
1. d4 e5 2. dxe5 Bc5 3. Nf3 d6 4. exd6 Ne7 5. dxe7 Bxf2+ 6. Kxf2 Qxd1
The other variation follows the same few first moves with the first main difference coming 2. ... Nc6.
The trouble comes if white tries to hold onto their pawn advantage for too long, 3. Nf3 Qe7 4. Bf4 leads to some trouble for white.
The only move here for white is 5. Bd2 and following 5. ... Qxb2, is 6. Nc3.
If white tries to attack the Queen with Bc3, there are tricks for black. Where after 6. ... Bb4, black is already evaluated as -4.5, much better
Where the only move for white is to take the bishop, and play from behind, but if white goes to further defend the bishop with 7. Qd2, black can play: 7. ... Bxc3 8. Nxc3 Qxa1+ 9. Nd1 Nxe5 and be winning a rook in the position.
If white tries to preserve the rook with 8. Qxc3, then 8. ... Qc1# is checkmate.